


Who we are
MyLifeline is a Cloud web based Emergency Platform founded in 2015. We have a range of panic buttons integrated into our platform. MyLifeline was the first company to provide a wearable panic device to the South African market and won the Santam Security Innovation award in 2018.
Software Manual
Set Password
You will receive an email that gives you access to manage your profile and device(s). Click on the "Reset Password" link to proceed. Please note if you do not setup your password in 24 hours, you can go to your site and click on the Get Password link to get a new reset password link.

Manage Devices
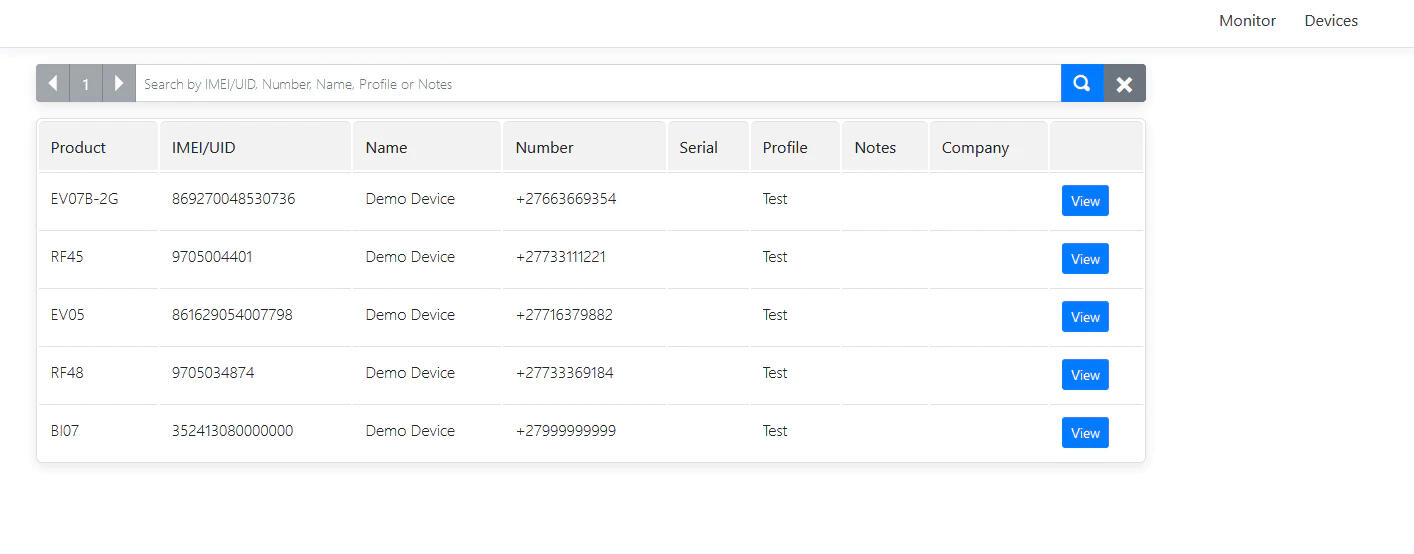
Once you logged in, you can click on Devices after which you need to accept the Data Processing Agreement. A list of all your devices will show, to view a device click on View.
Device Detail
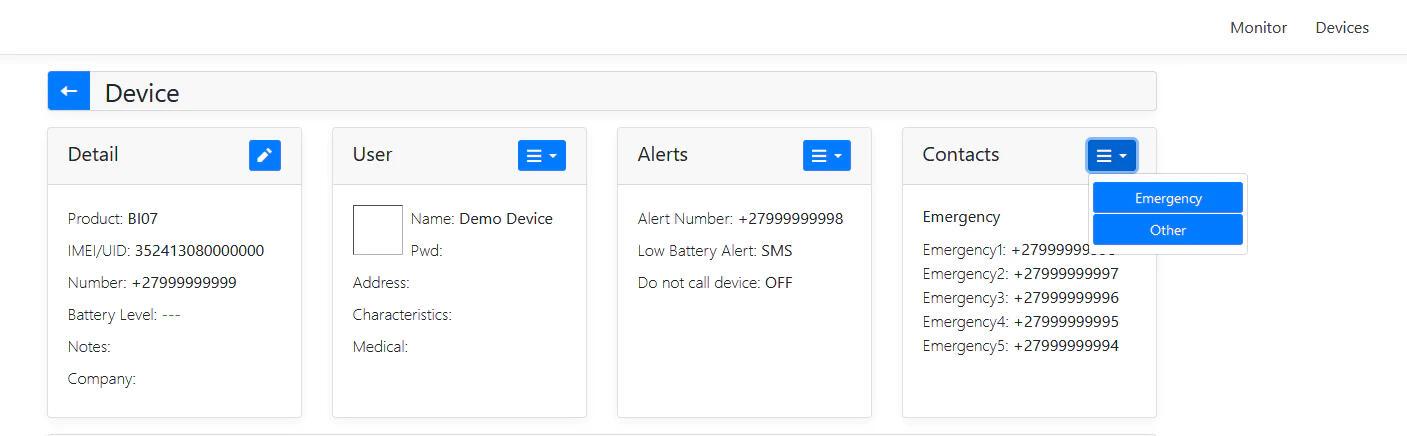
The Device detail will be displayed when you click on the View button next to a Device in the Devices screen. The Device detail screen allows you to setup your device number, alert number, emergency contact and detail about the wearer, like medical and other information.
Detail Widget
The Detail widget will show you detail about your device like the IMEI and SIM numbers. It will further show last time a connection was made from the device, the battery level and model of the device. Click on the blue edit button to make changes to the detail below.
| Property | Description |
|---|---|
| Product | Model of Device |
| IMEI | The IMEI identification number of your device |
| Serial | The Serial number of your device often not used. |
| Number | The cell number of your device, you can give this number to your Emergency contact to contact you directly on the device. |
| Last State | The last state received from the device. |
| Active Track | This is only used for security companies that tracks their vehicles or staff in real-time. |
| Last Heartbeat | The last time the device made a connection with the platform. |
| Battery Level | The percentage battery power that is remaining on the device. |
| Notes | Any notes that you have made to identify your device. |
| Company | A field used to assign the device for a specific company on the platform. |
| Branch | A field used to assign the device a specific branch in a company on the platform. |
User Widget
The user widget allows you to setup your name, password for the control room to verify you, characteristics like height, hair color, address and medical conditions. Click on the blue dopdown button on the widget to make changes to the data below.
| Property | Description |
|---|---|
| Name | The name to identify the device. |
| Pwd | Password for the control room to verify the caller. |
| Address | The user physical address where he/she is mostly located. |
| Characteristics | This can be used to identify a person or vehicle. |
| Medical | Medical and Allergy conditions can be listed here for the operator to give to medical personnel. |
Alerts Widget
The alerts allows you to setup the number to receive SMS notifications of low battery levels on a device. You can also setup if you want the control room to phone the device in an emergency situation, in a hostage situation some people prefer that the device is not called but only the emergency contacts. Click on the blue dopdown button on the widget to make changes to the data below.
| Property | Description |
|---|---|
| Alert Number | The number to receive SMS notifications for low battery. |
| Low Battery Alert | Switch the low battery notifications on or off. |
| Do not call device | If this setting is ON, then the device number will not be shown to the control room operator and will not be called, only emergency contacts will be called. |
Emergency Contacts Widget
The emergency contacts are the 5 contacts that will receive an SMS in the event of a panic. Your estimated GPS location will be sent in the SMS. Most of our devices are white listed in order to avoid SPAM calls. In the dropdown the Other selection can be used to white list numbers that will not receive a SMS in the event of a panic but still can phone the device. Click on the blue dopdown button on the widget to make changes to the data below.
| Property | Description |
|---|---|
| Emergency 1 - 5 | Numbers that will receive a panic SMS with your estimate GPS location. |
Monitor
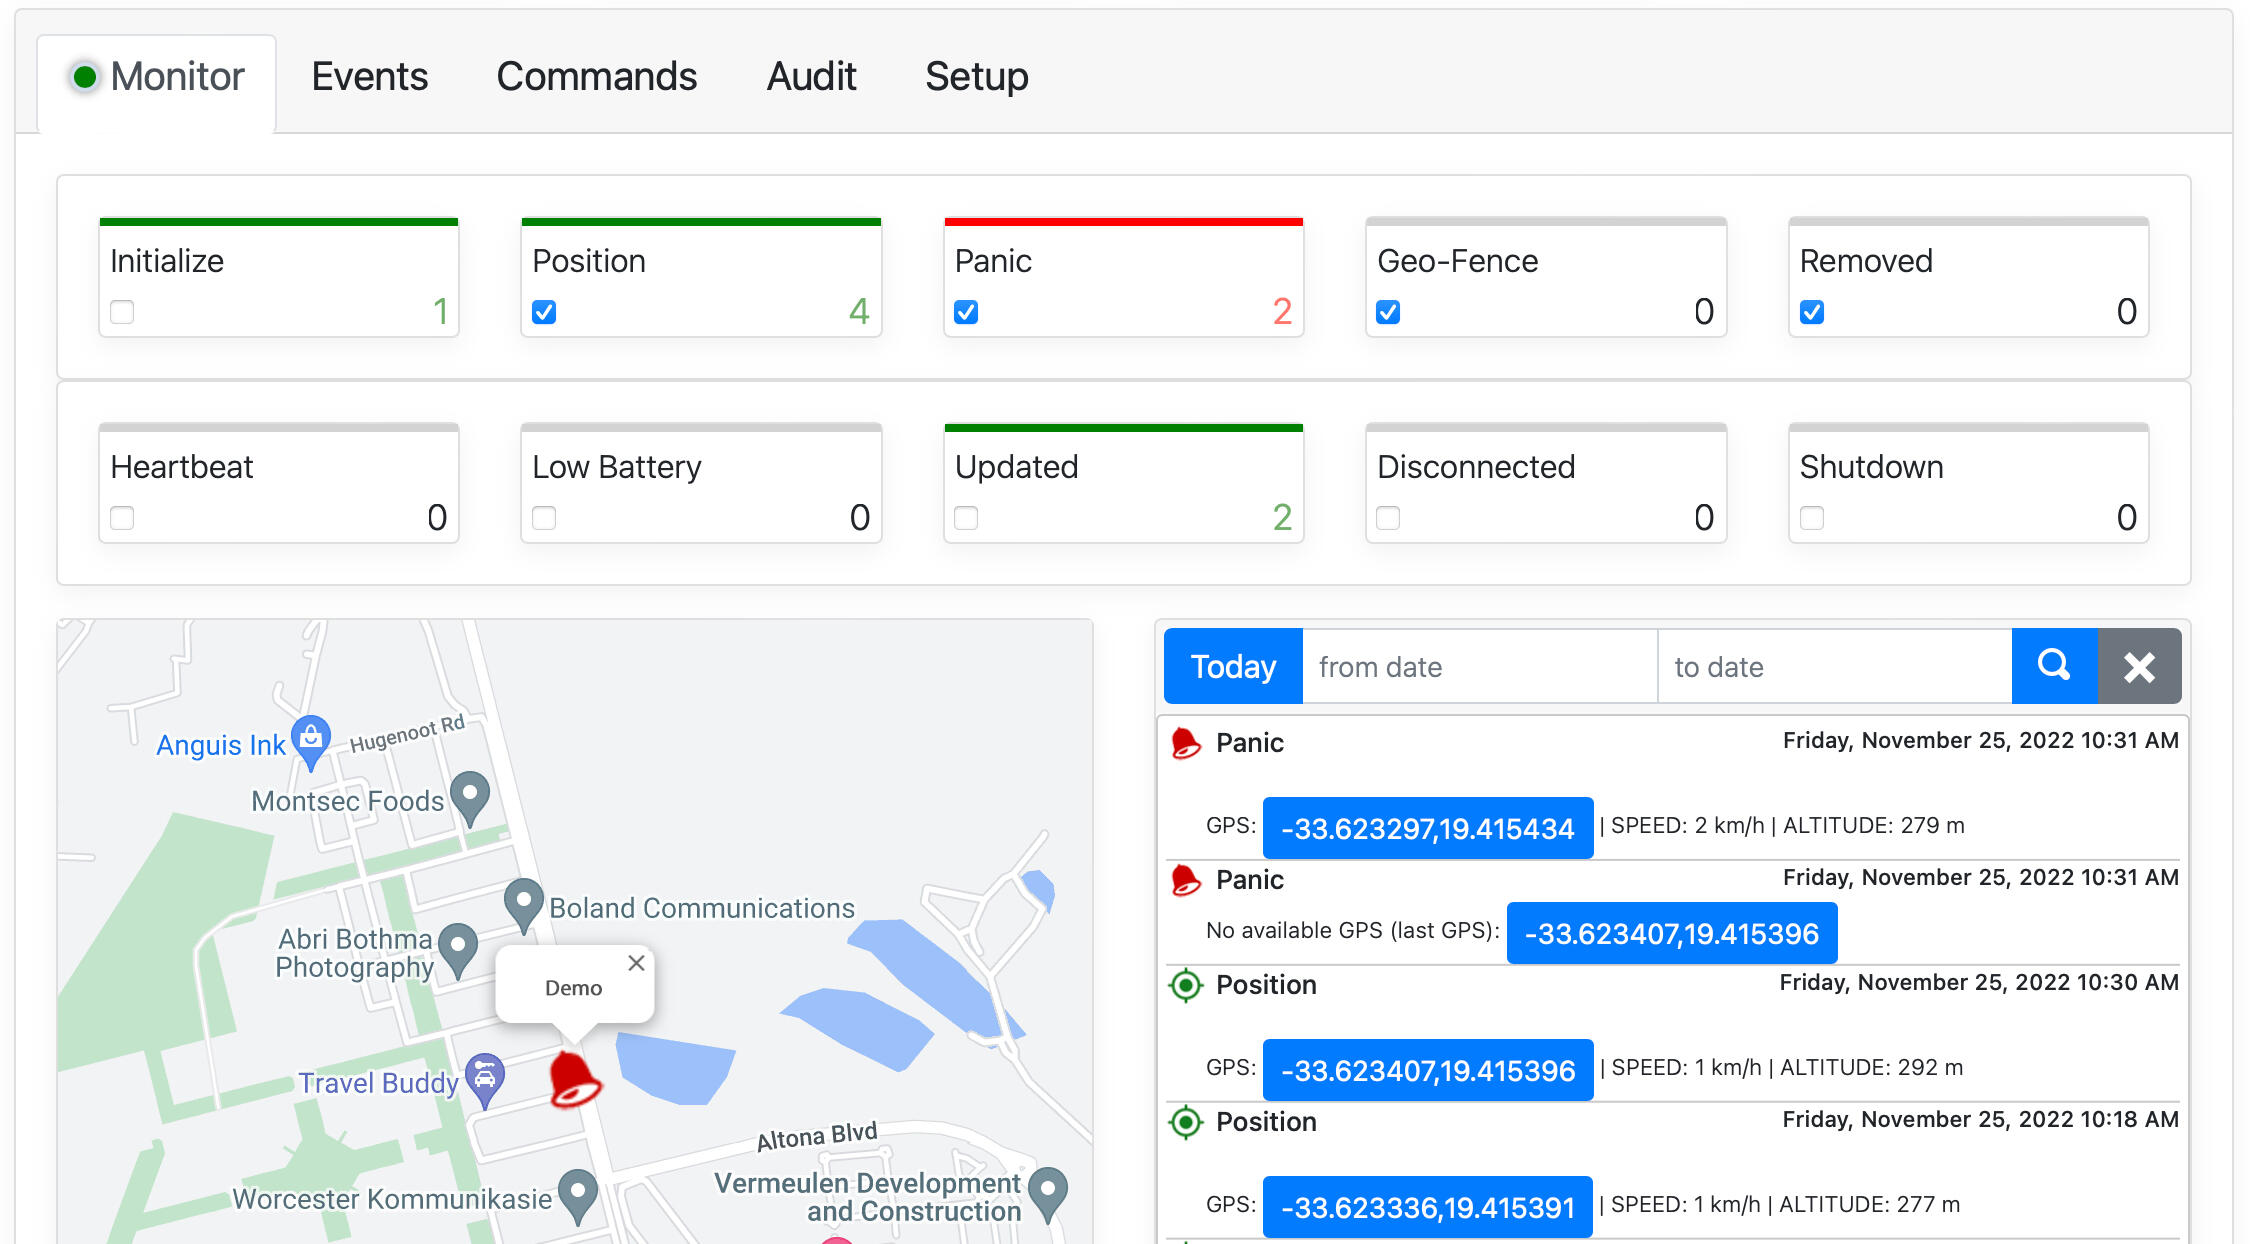
The Monitor section will show you a Map with the last location of your device. It will show indicators of states received from the device as well. Clicking the checkbox will display that data in the detail section. It will further show a history of states for the past day. Speed, altitude and status of your device will also be shown in the detail section. Click on the blue GPS location button to view the location on the map.
Events
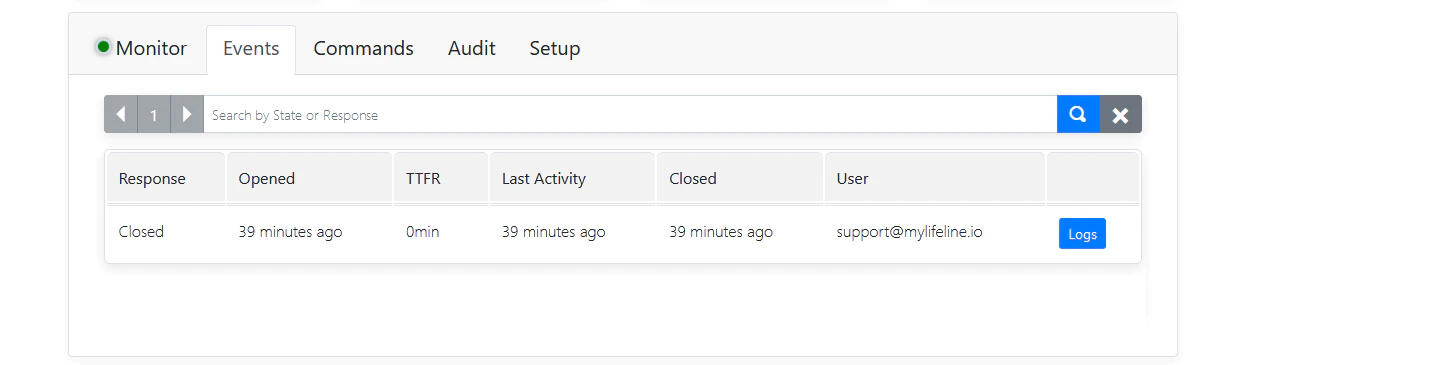
The Events section will show a list of Panic events handled by the control room operators. It will show who handled the event and how long it took to respond and close the event. The Logs blue button will show detail of every event change while the event was handled.
| Column | Description |
|---|---|
| Response | Response status, Open, Closed etc. |
| Opened | Time the call was opened. |
| TTFR | Time to first response, how long it took for the operator to open the call. |
| Last Activity | Time of last activity on call. |
| Closed | Time since the call was closed. |
| User | The user that handled the call. |
Commands
The Commands section will show all commands sent to the device. Commands are mostly for administration usage to ensure configuration of devices completed successfully.
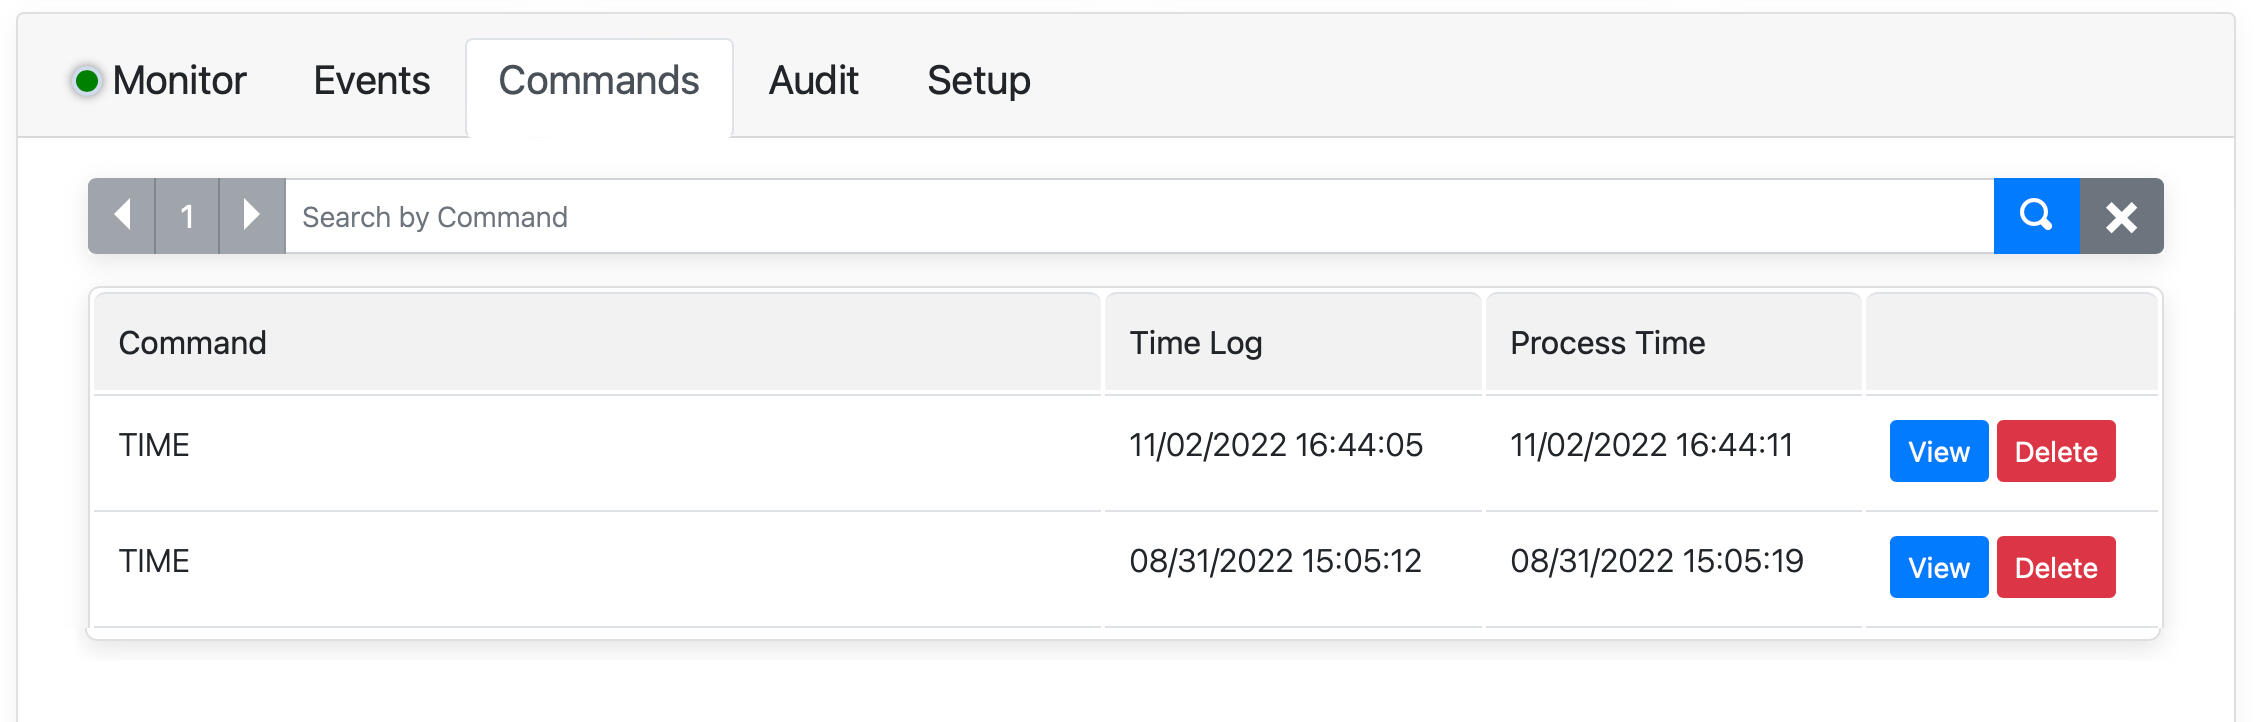
| Column | Description |
|---|---|
| Command | Command sent to the device. |
| Time Log | Time command was created. |
| Process Time | Time command was sent to the device. |
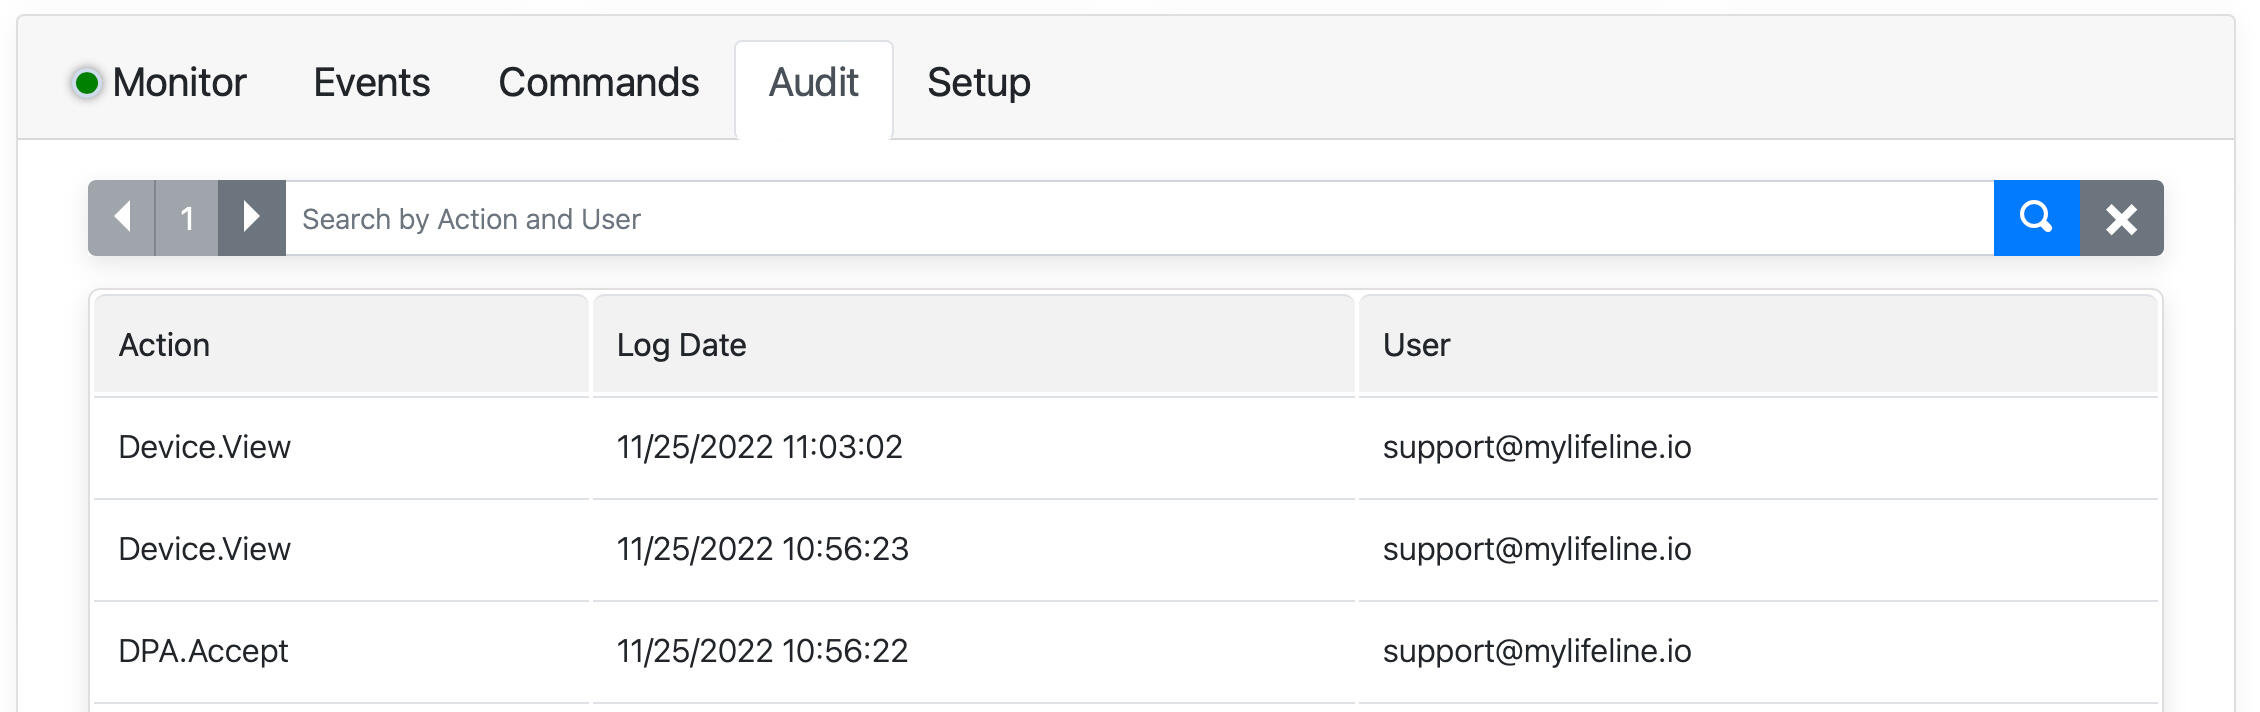
Audit
The Audit section will show an audit trail of all the user actions on the system. Login, view of specific Devices and accounts and acceptance of DPA agreements.
| Column | Description |
|---|---|
| Action | Type of action performed by the user. |
| Log Date | Time and date of action. |
| User | User that performed the action. |
Setup
The Setup section is used to set specific configurations per device type. Each setup screen may differ per device type as each device have different functionalities. Most devices have buttons to power-off, restart and re-configure the device.
Select your device below for specific setup and device guides.


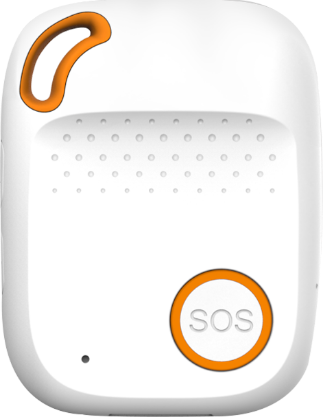
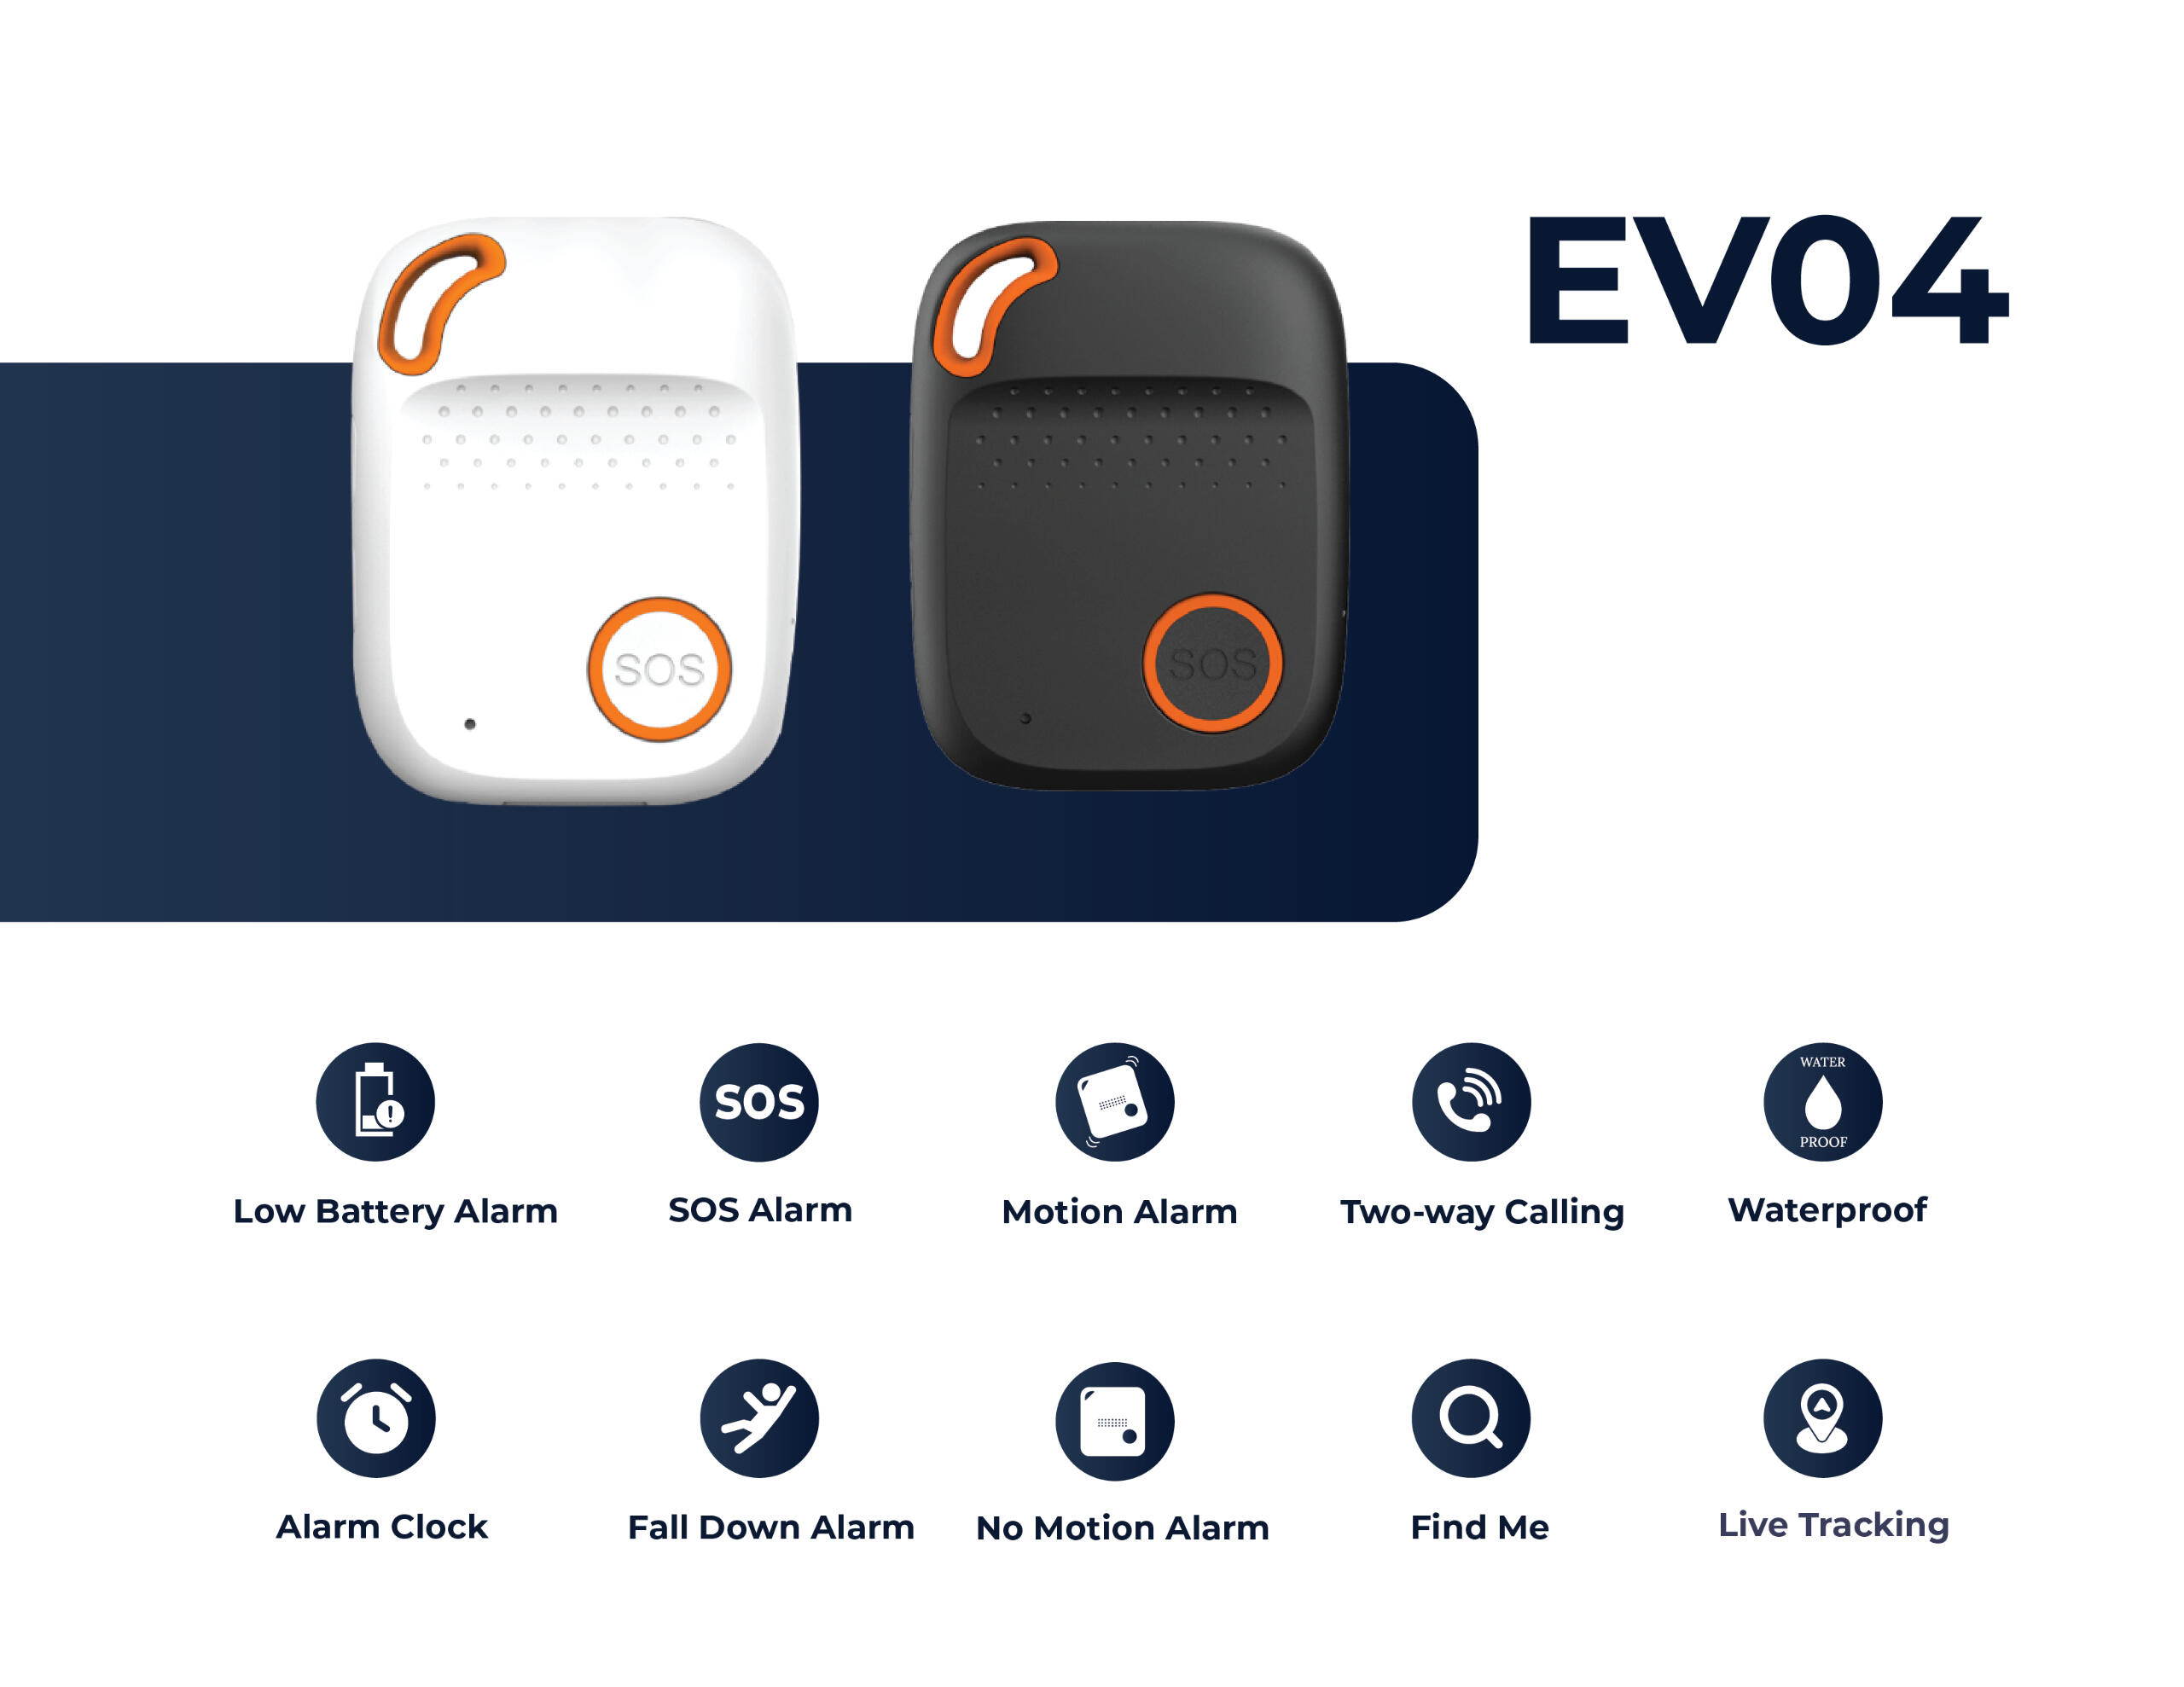
Eview 04 Manual

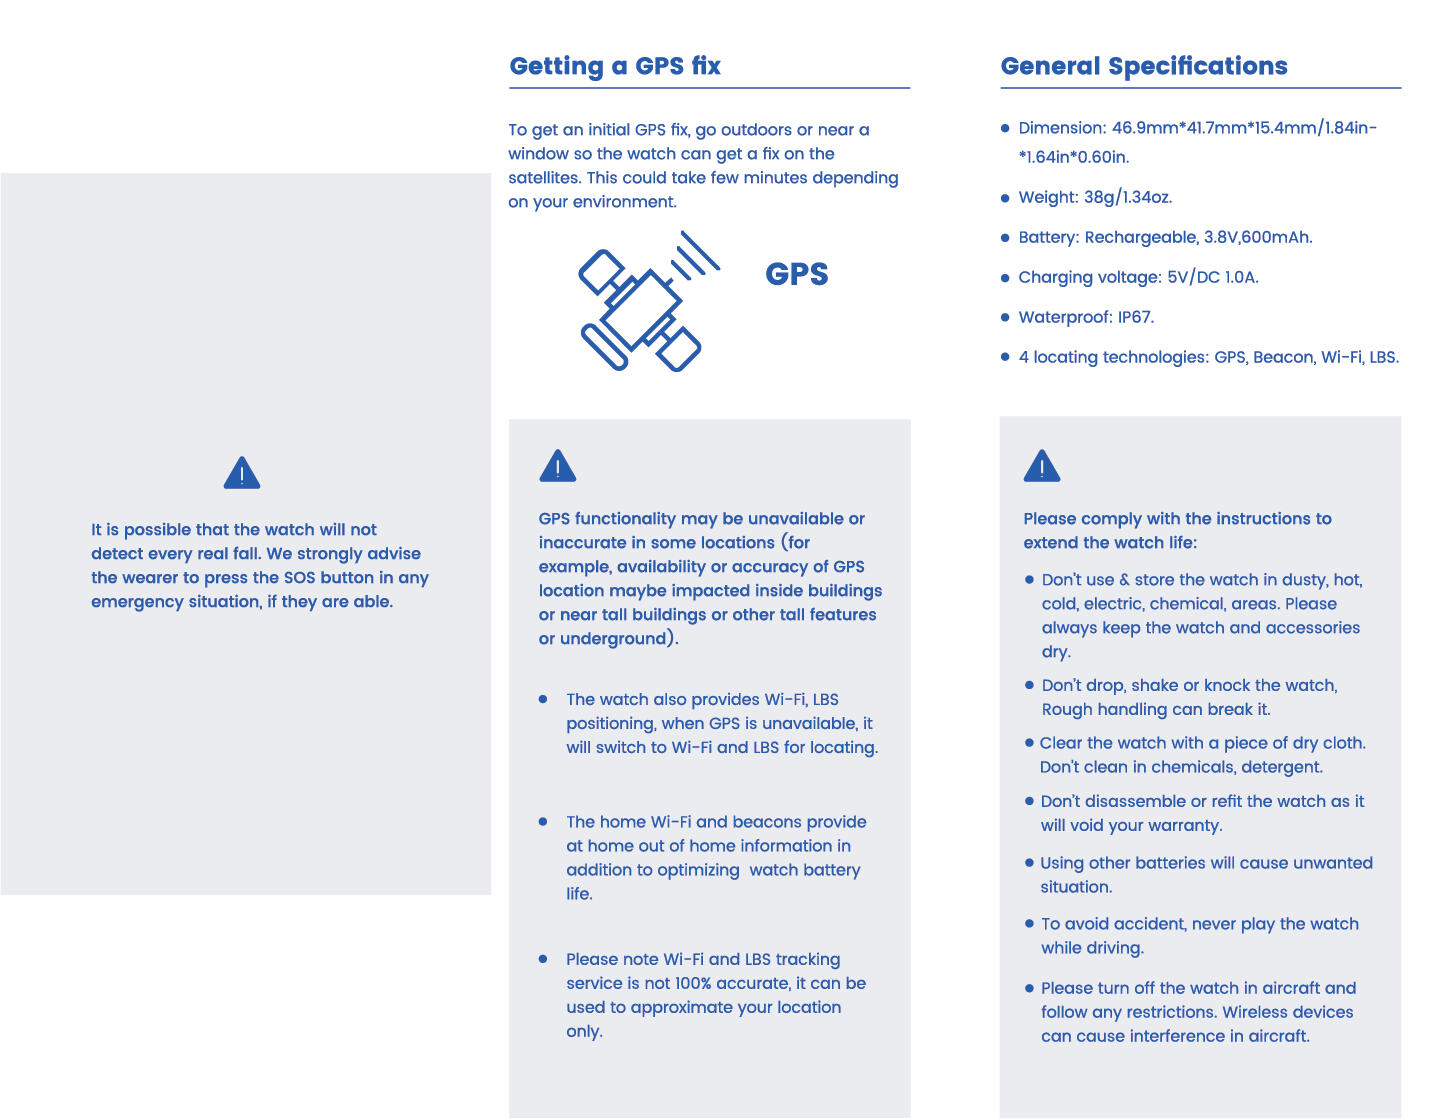
Getting Started
1. Charge your watch for few hours by attaching the magnetic charger to the back.
2. Press the button on the device to request the device’s charging status; if the device is fully charged it must be removed from its charging dock. The device will power on automatically once placed on its charger and connected to a travel adapter.
3. Your device is IPX7 weather proof rated. It implies that your device is waterproof and that it can be fully submerged into 1-meter deep water for up to 30 minutes and still be able to work properly after that.
4. Please note that having an activated/registered, recharged SIM card is crucial for the device’s communication. Always ensure Airtime and SMS bundles are loaded on your SIM to ensure communication to your service provider. Your service provider may offer SIM management as part of your service.
5. Log in to your MyLifeline account by using the email address you provided your service provider and create your password.
6. Manage your information and contact information of your pendant device on your MyLifeline account using your internet browser.
7. Once you have updated and SAVED all your changes, restart/reboot the device by selecting the reboot option from the Settings - System options in the Menu. Updates can take up to a day depending on your location and network provider.
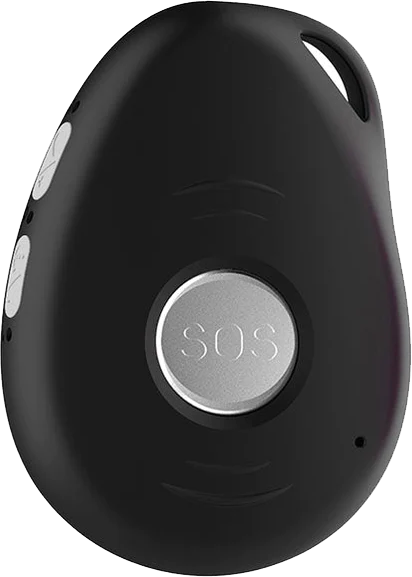
8. Once your has powered on, you can press and hold the "SOS" button (1) in until your device vibrates. You can choose to cancel the "SOS" should it not be a real emergency. If you do not select the "Cancel" option, the device will continue to escalate the emergency to the service provider's control room.
9. The emergency contacts you specified will receive an SMS. Please note the SMS delivery duration is dependent on the signal strength of your device and on the signal strength of your emergency contact's device.
10. Please note that your chosen network operator may disconnect your network or fail to provide service in an area for any reason and without prior notice to you due to any reason they may/may not provide. It is YOUR RESPONSIBILITY to ensure your device is always in a working order and connected to the MyLifeline system.
11. Test your device often and ensure you have a working, recharged SIM inserted.
12. Your GPS accuracy will be best outdoors. Test your device outdoors for the first time, the system will record your last GPS location.
Device Manual
| Function |
|---|
| 1. SOS Call & Power ON button |
| Long press this button to power on if the device has been powered off. |
| Long press this button when device is on to send an SOS panic signal to your contacts and the control room. |
| 2. Charging Pins |
| These charging pings align with your magnetic charging base and will snap in to charge. |
| 3. Speaker |
| Volume can be set for the voice prompt and incoming calls. |
| 4. Charging Base |
| The charging base and travel adapter are included with the device and carry limited warranty terms. This charging base uses USB Type C cables to connect to a power source. |
| When placing your device on the charging base (when connected to mains) the device will auto-power on after reaching sufficient battery power to power on. Once the device has powered, it will automatically connect to the service after a few minutes. |
| 5. Type C USB Cable |
| The charging base can be used with any USB Type C cable and charger. |
| The expected charge time is around 01h30 when using a 5V2A travel adapter. |
| The expected battery life is 12 to 48 hours depending on your device's configuration and your movement, the frequency thereof and the duration. |
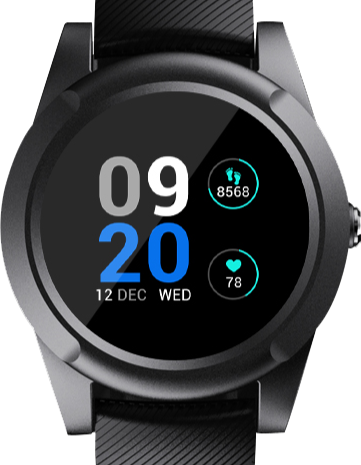
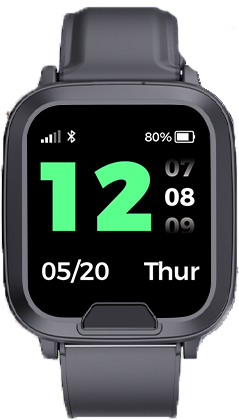
Eview 05 Manual
Getting Started
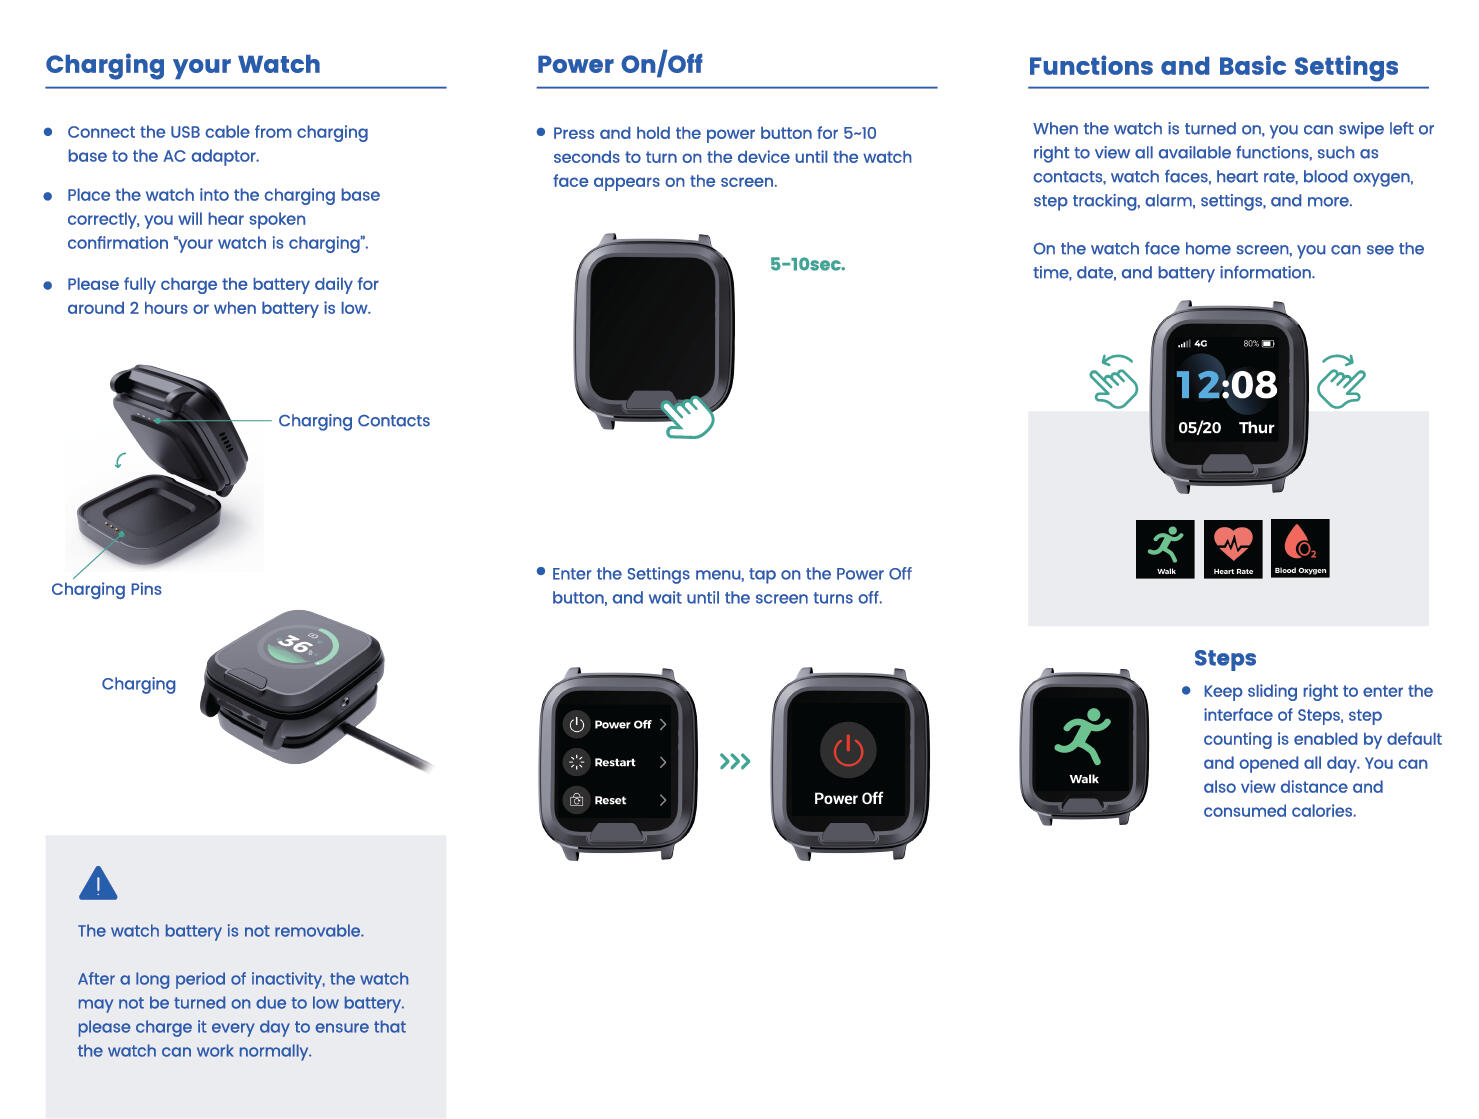
1. Charge your watch for few hours by attaching the magnetic charger to the back.
2. Press the button on the device to request the device’s charging status; if the device is fully charged it must be removed from its charging dock. The device will power on automatically once placed on its charger and connected to a travel adapter.
3. Double tap the touch screen or press the side button to activate the screen.
4. Remove the seal on the touch screen if desired.
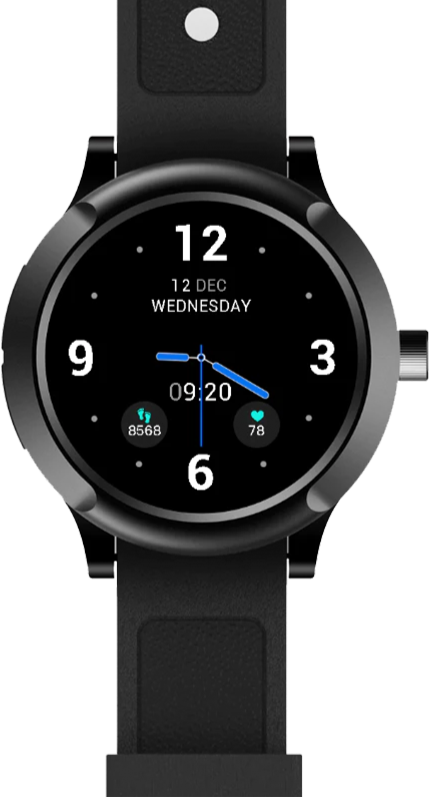
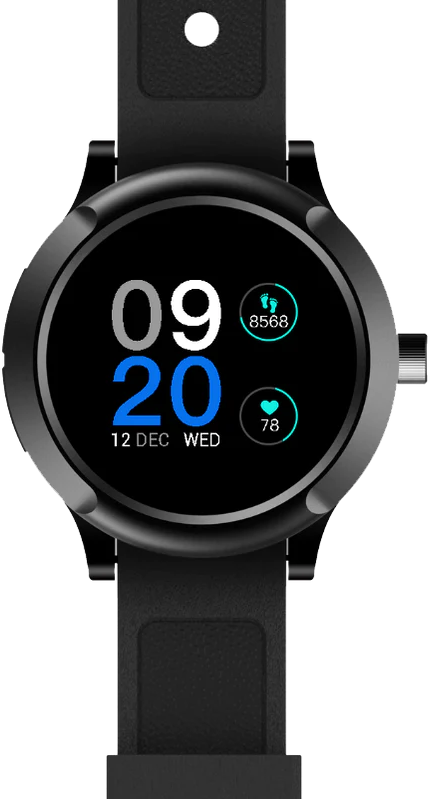
5. You can choose which dial face you prefer by scrolling through the Menu options by swiping to the left.
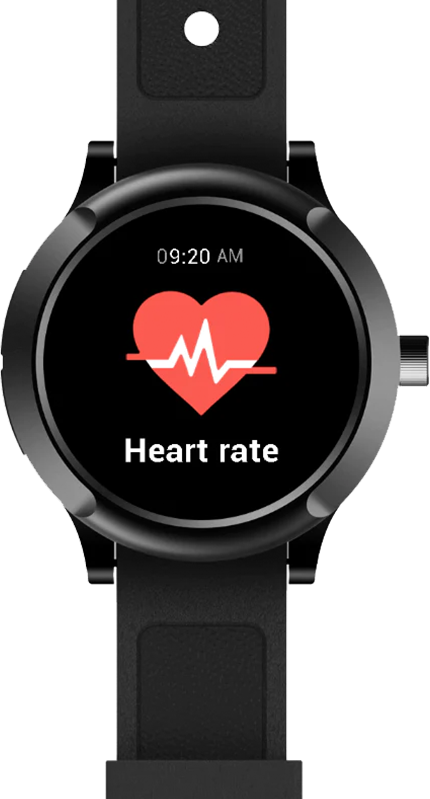
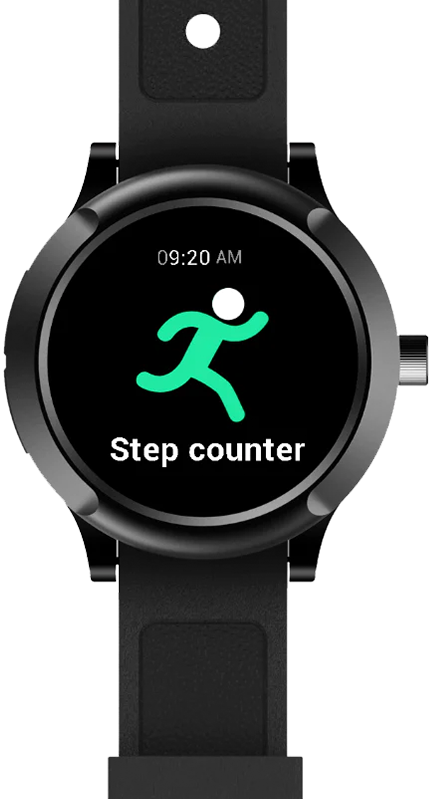
6. You can measure your heart rate at a given time and your steps for the day. When measuring your heart rate, ensure that the device is making proper contact with your wrist. It takes around 1 minute to complete.
7. Your device is IPX7 weather proof rated. It implies that your device is
waterproof and that it can be fully submerged into 1-meter deep water
for up to 30 minutes and still be able to work properly after that.
8. Please note that having an activated/registered, recharged SIM card is crucial for the device’s communication. Always ensure Airtime and SMS bundles are loaded on your SIM to ensure communication to your service provider. Your service provider may offer SIM management as part of your service.
9. Log in to your MyLifeline account by using the email address you provided your service provider and create your password.
10. Manage your information and contact information of your pendant device on your MyLifeline account using your internet browser.
11. Once you have updated and SAVED all your changes, restart/reboot the device by selecting the reboot option from the Settings - System options in the Menu. Updates can take up to a day depending on your location and network provider.
12. Once your has powered on, you can press and hold the side button (1) in until your device vibrates and a message displaying "SOS" appears on the screen. You can choose to cancel the "SOS" should it not be a real emergency. If you do not select the "Cancel" option, the device will continue to escalate the emergency to the service provider's control room.
13. The emergency contacts you specified will receive an SMS. Please note the SMS delivery duration is dependent on the signal strength of your device and on the signal strength of your emergency contact's device.
14. Please note that your chosen network operator may disconnect your network or fail to provide service in an area for any reason and without prior notice to you due to any reason they may/may not provide. It is YOUR RESPONSIBILITY to ensure your device is always in a working order and connected to the MyLifeline system.
19. Test your device often and ensure you have a working, recharged SIM inserted.
20. Your GPS accuracy will be best outdoors. Test your device outdoors for the first time, the system will record your last GPS location.
Device Manual
| Function |
|---|
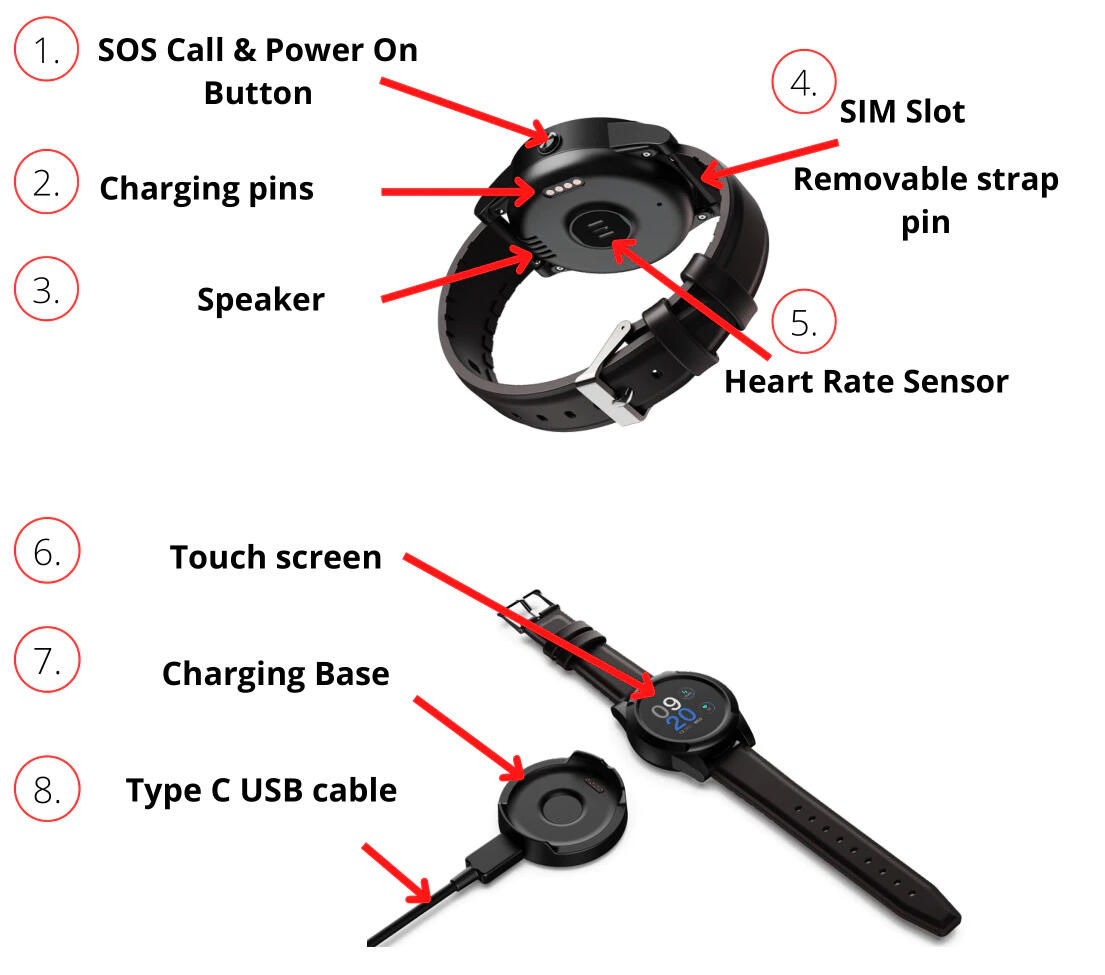
| 1. SOS Call & Power ON button |
| Long press this button to power on if the device has been powered off. |
| Long press this button when device is on to send an SOS panic signal to your contacts and the control room. |
| Press once to activate the touchscreen. |
| 2. Charging Pins |
| These charging pings align with your magnetic charging base and will snap in to charge. |
| **3. Speaker ** |
| Volume can be set for the voice prompt and incoming calls. |
| **4. SIM slot and removable strap pin ** |
| The SIM slot is behind the wrist strap and can be accessed only by removing te strap spring pin connector. Slide the pin to remove the strap. This device uses a Nano SIM card. |
| **5. Heart Rate Sensor ** |
| This sensor must be in constant contact with the user's wrist while performing the measurement. The last measured rate will be displayed on the watch screen - depending on which dial option you have chosen. |
| 6. Touch screen |
| The EV05 has a touch screen for ease-of-use. Slide the screen to the left to access the menu options or settings. You can review your device's current setup under the Settings Menu. |
| 7. Charging Base |
| The charging base and travel adapter are included with the device and carry limited warranty terms. This charging base uses USB Type C cables to connect to a power source. |
| When placing your device on the charging base (when connected to mains) the device will auto-power on after reaching sufficient battery power to power on. Once the device has powered, it will automatically connect to the service after a few minutes. |
| 8. Type C USB Cable |
| The charging base can be used with any USB Type C cable and charger. |
| The expected charge time is around 01h30 when using a 5V2A travel adapter. |
| The expected battery life is 12 to 48 hours depending on your device's configuration and your movement, the frequency thereof and the duration. |
EV06 Device Manual

Getting Started
1. Charge your pendant for few hours by placing the device in the charger base.
2. Press the button on the device to request the device’s charging status as well as to power on; if the device is fully charged it must be removed from its charger base. The device will power on automatically once placed on it's charger and connected to a travel adapter.
3. Should the device become inactive, simply press the SOS button once for the device to power on.
4. Your device is IPX7 weather proof rated. It implies that your device is waterproof and that it can be fully submerged into 1-meter deep water for up to 30 minutes and still be able to work properly after that.
5. Please note that having an activated/registered, recharged SIM card is crucial for the device’s communication. Always ensure Airtime and SMS bundles are loaded on your SIM to ensure communication to your service provider. Your service provider may offer SIM management as part of your service.
6. Log in to your MyLifeline account by using the email address you provided your service provider and create your password.
7. Manage your information and contact information of your pendant device on your MyLifeline account using your internet browser.
8. Once you have updated and SAVED all your changes, restart/reboot the device by selecting the reboot option from the Settings - System options in the Menu. Updates can take up to a day depending on your location and network provider.
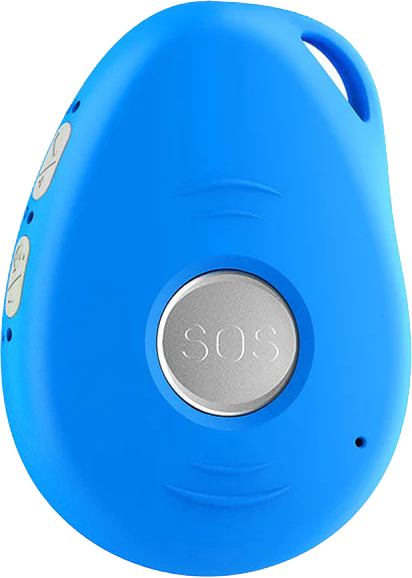
9. Once your has powered on, you can press and hold the centre/panic button (1) in until your device vibrates and a message displaying "SOS" appears on the screen. You can choose to cancel the "SOS" should it not be a real emergency. If you do not select the "Cancel" option, the device will continue to escalate the emergency to the service provider's control room.
10. The emergency contacts you specified will receive an SMS. Please note the SMS delivery duration is dependent on the signal strength of your device and on the signal strength of your emergency contact's device.
11. Please note that your chosen network operator may disconnect your network or fail to provide service in an area for any reason and without prior notice to you due to any reason they may/may not provide. It is YOUR RESPONSIBILITY to ensure your device is always in a working order and connected to the MyLifeline system.
19. Test your device often and ensure you have a working, recharged SIM inserted.
20. Your GPS accuracy will be best outdoors. Test your device outdoors for the first time, the system will record your last GPS location.
Device Manual


| Function |
|---|
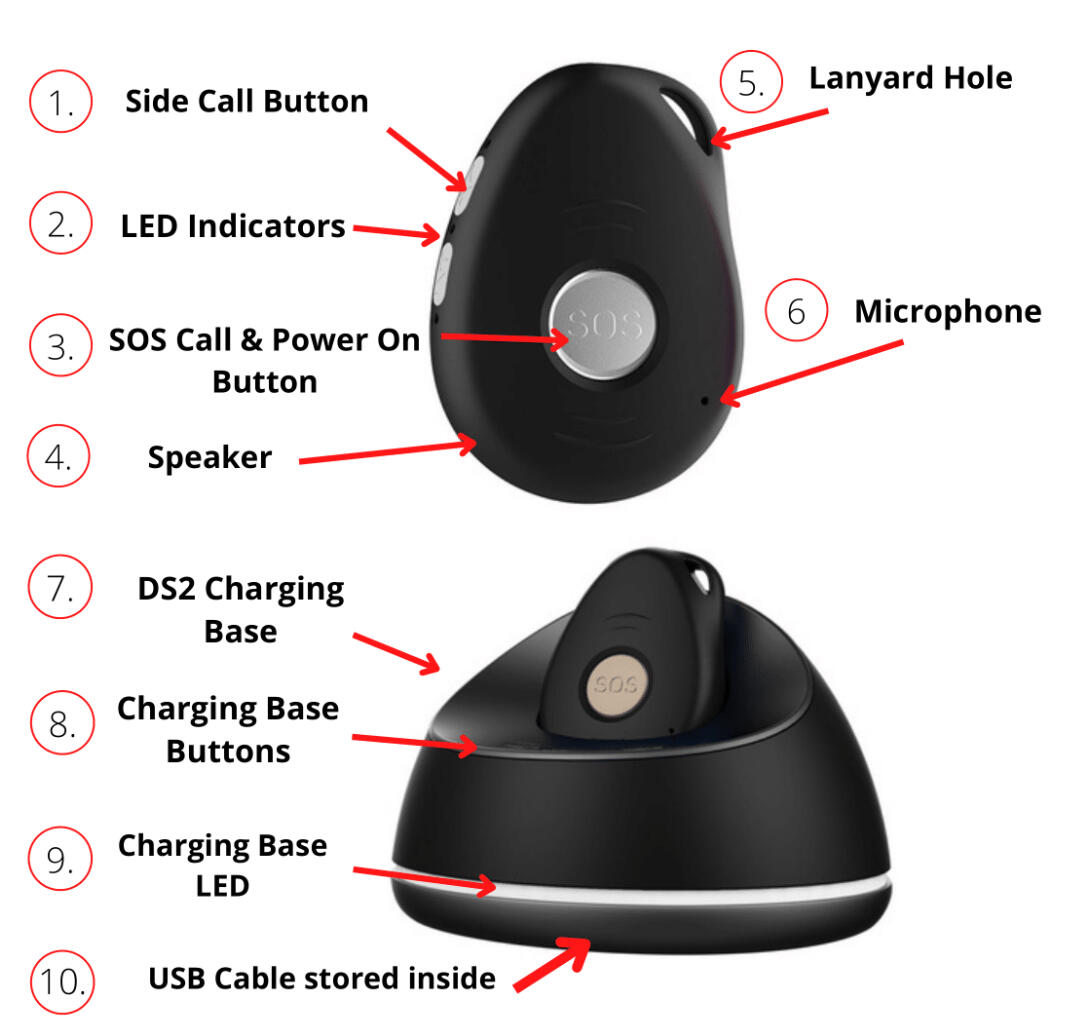
| 1. Side Call Button |
| This button issued to dial a pre programmed contact number. |
| This button is used to manually activate and deactivate the Voice Prompt feature for the device. |
| 2. LED Indicators |
| The LED lights help determine the device's status and available LED's must be visibly ON for the device to be connected to the service. |
| GREEN LED indicates a connection. |
| BLUE LED indicates GPS locating activity/communication. |
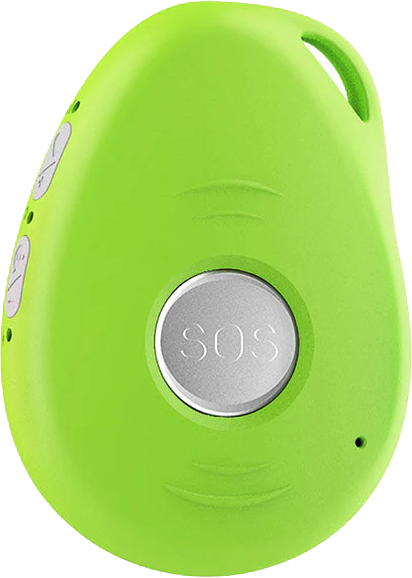
| 3. SOS Call & Power On Button |
| Press this button once to power on your device. |
| Long press the SOS button to send an emergency SOS alert to your contacts. |
| 4. Speaker |
| Ensure the Speaker is unobstructed when communicating via the device. |
| 5. Lanyard hole |
| The Lanyard is looped through this hole and secured on itself. |
| Key-ring are also attached in this area. |
| 6. Microphone |
| Ensure the Microphone hole is always open and visible. |
| Ensure not to place your finger/hand over the microphone hole when communicating via the device. |
| 7. Charging Base DS1/DS2 |
| The charging base is excluded from all Eview 07 device orders and must be selected separately. |
| Travel adapter included with the device and carries limited warranty terms. |
| The DS1 charging base uses its own Micro USB cable to connect to a power source. |
| The DS2 charging base uses its own USB cable to connect to a power source. |
| When placing your device on the charging base (when connected to mains) the device will auto-power on after reaching sufficient battery power to power on. Once the device has powered, it will automatically connect to the service after a few minutes. |
| 8. Charging Base Buttons (only DS2 Base) |
| The charging base buttons can be used to turn the charging base's Voice Prompt On/Off. |
| 9. Charging Base LED |
| LED strip visible when charging base connected to mains, indicating active power supply to charging base. |
| 10. Charging Base Cable |
| The DS2 charging base has it's own cable (cannot be removed) that is stored underneath the charging base when not in use. |
| The DS1 charging base's cable can be disconnected from the charging base. |
EV07 Device Manual
Getting Started
1. Charge your pendant for few hours by placing the device in the charger base.
2. Press the button on the device to request the device’s charging status as well as to power on; if the device is fully charged it must be removed from its charger base. The device will power on automatically once placed on it's charger and connected to a travel adapter.
3. Should the device become inactive, simply press the SOS button once for the device to power on.
4. Your device is IPX7 weather proof rated. It implies that your device is
waterproof and that it can be fully submerged into 1-meter deep water
for up to 30 minutes and still be able to work properly after that.
5. Please note that having an activated/registered, recharged SIM card is crucial for the device’s communication. Always ensure Airtime and SMS bundles are loaded on your SIM to ensure communication to your service provider. Your service provider may offer SIM management as part of your service.
6. Log in to your MyLifeline account by using the email address you provided your service provider and create your password.
7. Manage your information and contact information of your pendant device on your MyLifeline account using your internet browser.
8. Once you have updated and SAVED all your changes, restart/reboot the device by selecting the reboot option from the Settings - System options in the Menu. Updates can take up to a day depending on your location and network provider.
9. Once your has powered on, you can press and hold the side button (1) in until your device vibrates and a message displaying "SOS" appears on the screen. You can choose to cancel the "SOS" should it not be a real emergency. If you do not select the "Cancel" option, the device will continue to escalate the emergency to the service provider's control room.
10. The emergency contacts you specified will receive an SMS. Please note the SMS delivery duration is dependent on the signal strength of your device and on the signal strength of your emergency contact's device.
11. Please note that your chosen network operator may disconnect your network or fail to provide service in an area for any reason and without prior notice to you due to any reason they may/may not provide. It is YOUR RESPONSIBILITY to ensure your device is always in a working order and connected to the MyLifeline system.
19. Test your device often and ensure you have a working, recharged SIM inserted.
20. Your GPS accuracy will be best outdoors. Test your device outdoors for the first time, the system will record your last GPS location.
Device Manual
| Function |
|---|
| 1. Side Call Button |
| This button issued to dial a pre programmed contact number. |
| This button is used to manually activate and deactivate the Voice Prompt feature for the device. |
| 2. LED Indicators |
| The LED lights help determine the device's status and available LED's must be visibly ON for the device to be connected to the service. |
| GREEN LED indicates a connection. |
| BLUE LED indicates GPS locating activity/communication. |
| 3. SOS Call & Power On Button |
| Press this button once to power on your device. |
| Long press the SOS button to send an emergency SOS alert to your contacts. |
| 4. Speaker |
| Ensure the Speaker is unobstructed when communicating via the device. |
| 5. Lanyard hole |
| The Lanyard is looped through this hole and secured on itself. |
| Key-ring are also attached in this area. |
| 6. Microphone |
| Ensure the Microphone hole is always open and visible. |
| Ensure not to place your finger/hand over the microphone hole when communicating via the device. |
| 7. Charging Base DS1/DS2 |
| The charging base is excluded from all Eview 07 device orders and must be selected separately. |
| Travel adapter included with the device and carries limited warranty terms. |
| The DS1 charging base uses its own Micro USB cable to connect to a power source. |
| The DS2 charging base uses its own USB cable to connect to a power source. |
| When placing your device on the charging base (when connected to mains) the device will auto-power on after reaching sufficient battery power to power on. Once the device has powered, it will automatically connect to the service after a few minutes. |
| 8. Charging Base Buttons (only DS2 Base) |
| The charging base buttons can be used to turn the charging base's Voice Prompt On/Off. |
| 9. Charging Base LED |
| LED strip visible when charging base connected to mains, indicating active power supply to charging base. |
| 10. Charging Base Cable |
| The DS2 charging base has it's own cable (cannot be removed) that is stored underneath the charging base when not in use. |
| The DS1 charging base's cable can be disconnected from the charging base. |
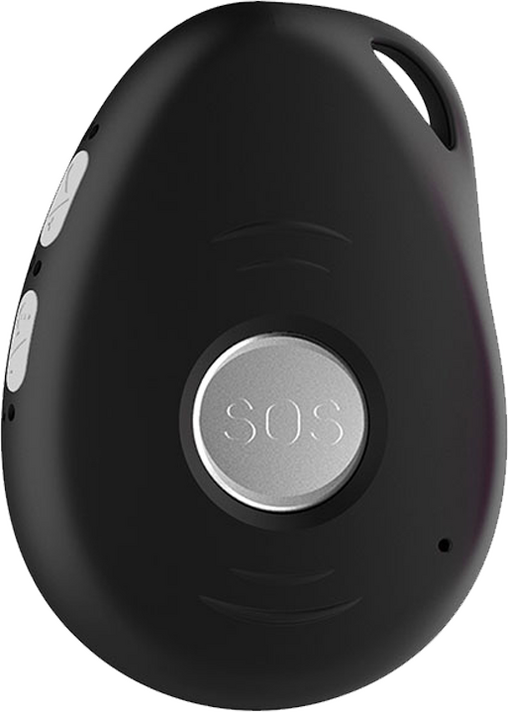
RF45 Device Manual

Getting Started
1. Charge your Pendant for few hours by attaching the magnetic charger to the back. You will notice it just snaps on. Fit your USB cable through the hole n the back of the charging base and orient the cable to align with the device's charging connector pins.
2. Press the button (4) on the device to request the device’s charging status; if the device is fully charged it may be removed from its charging dock. Press and hold the SOS button (4) to power on the device.
3. Use the screwdriver provided to loosen the two screws ONLY if required. (2)
4. Remove the seal with the SIM tool and insert a nano SIM card in the slot as shown by the symbol on the device.
5. Use the SIM tool to ensure the SIM card has been inserted properly.
6. Place the seal back in the sim slot, aligning the holes with the device’s holes.
7. Place the small metal plate on top of the seal and re insert the screws removed in step (2). Then fasten the screws with the screwdriver.
8. Please note that having an activated/registered, recharged SIM card is crucial for the device’s communication. Always ensure Airtime and SMS bundles are loaded on your SIM to ensure communication to your service provider. Your service provider may offer SIM management as part of your service.
9. Take the lanyard provided and feed the thin end into the lanyard hole on the pendant device. Using the SIM tool (from the other side of the hole you can thread the lanyard through and loop over itself. You can also opt to use the silicon band provided. Simply slide the device in at a diagonal angle and press down to seat in the silicon band.
10. Press and hold the button (4) for a few seconds until you see a message on the LCD screen say ‘’Hello".
11. Wait for about 1 minute for the device to power and connect to the system. Please note the connection icons to know what your current signal strength is. Please always take note of these as you travel/move between locations.
12. Log in to your MyLifeline account by using the email address you provided your service provider and create your password as set out in the steps above.
13. Manage your information and contact information of your pendant device on your MyLifeline account using your internet browser.
14. Once you have updated and SAVED all your changes. Please allow up to 10 minutes for the settings to take effect. This is to ensure the device requests new information from the system that may have changed. Updates can take up to a day depending on your location and network provider.
15. Once the device has powered on and the welcome tone played, wait approx. 1 to 2 minutes and press the panic button for 1 second:
VOICE PROMPT: The Voice prompt of the device may be set to audibly notify the user what the time is when the SOS button is pressed once.If nothing is heard when pressed, the VOICE PROMPT setting has been deactivated. Please request your service provider to change these settings for you.
1. When the SOS button is pressed for approx. 3 seconds, the device will vibrate and may display a message on the LCD display stating that no number has been set. Please ignore this as the device is connected to your service provider and does not require a number to be set.
2. The vibrate function and message indicate that the panic alert has been sent from the device.
3. Should the device power off when long pressing the SOS button, this would indicate that the device is not connected with your service provider.
4. Should the time displayed on the LCD display be inaccurate, it means that the device is not connected to your service provider.
5. The emergency contacts you specified will receive an SMS. Please note the SMS delivery duration is dependent on the signal strength of your device and on the signal strength of your emergency contact's device.
6. Please note that your chosen network operator may disconnect your network or fail to provide service in an area for any reason and without prior notice to you due to any reason they may/may not provide. It is YOUR RESPONSIBILITY to ensure your device is always in a working order and connected to your service provider.
7. Test your device often and ensure you have a working, recharged SIM inserted.
8. Your GPS accuracy will be best outdoors. Test your device outdoors for the first time, the system will record your last GPS location.
Device Manual
| Function |
|---|
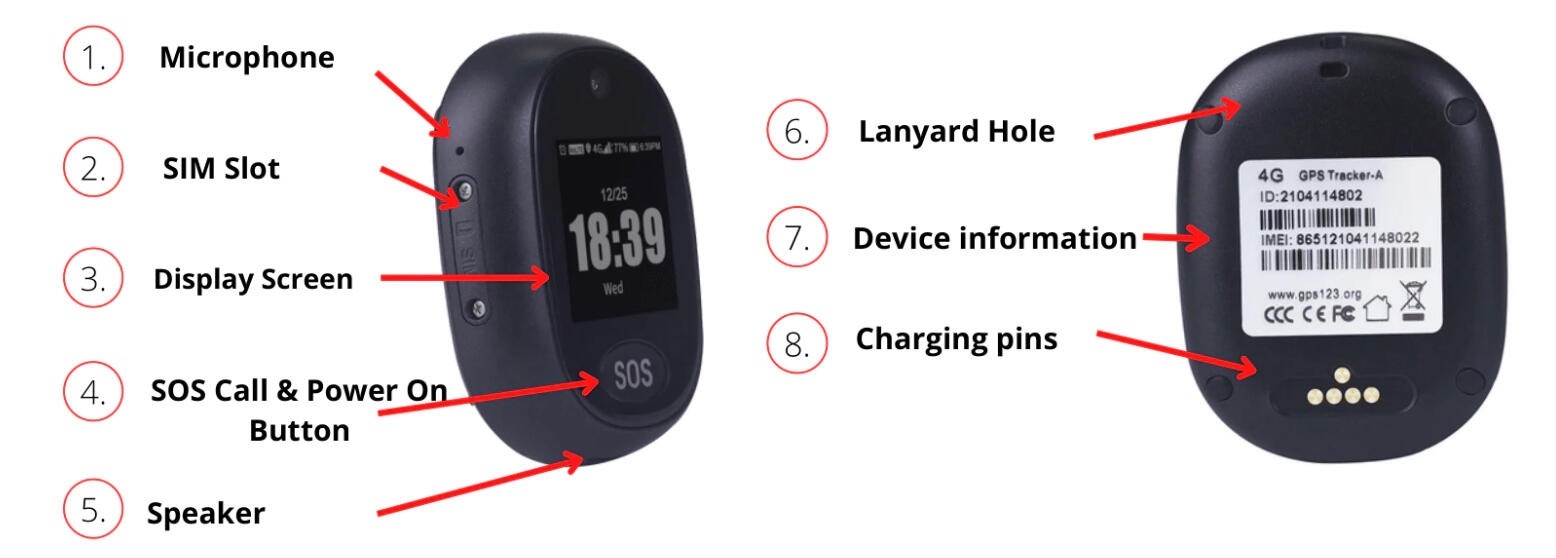
| **1. Microphone ** |
| Ensure the Microphone hole is always free of any obstructions and visible. |
| Ensure you do not place your finger/hand over this hole when communicating. |
| Ensure the Microphone hole is oriented the right way up when placing the device in the silicon wrist strap. |
| **2. SIM Slot ** |
| This device uses a Nano SIM card. Please DO NOT remove the SIM card. |
| **3. Display Screen ** |
| Time displayed in 24h digital format. |
| Battery life and connection status displayed on screen. |
| 4. SOS Call & Power Button |
| Long press the SOS button to power on the device if it had been powered off. |
| Press the SOS button once to hear the Voice Prompt announce the current time (Voice Prompt must be. activated). |
| Long press the SOS button to send a SOS alert to your contacts. |
| **5. Speakers ** |
| Sound and other audio from the device is played from this speaker. |
| Ensure that the speaker is not covered when communicating with the device. |
| Ensure the speaker hole is not covered by the silicon wrist strap. |
| **6. Lanyard Hole ** |
| The device's lanyard is fed through this hole and looped over it self to secure it in place. |
| 7. Device Information |
| Information relating to your device can be found the back of the device on the sticker. |
| This information is referenced when setting up your device or for any queries regarding your device. |
| 8. Charging pins |
| These charging pins align with the pins in the charging base and connect via magnetic connectors |
| The expected charge time is around 01h30 when using a 5V2A travel adapter. |
| The expected battery life is 12 to 48 hours depending on your device's configuration and your movement, the frequency thereof and the duration. |
| 9. Waterproof |
| RF V45 has an IP67 rating, which means you may shower with your device, but not submerge for depths greater than 1m. |
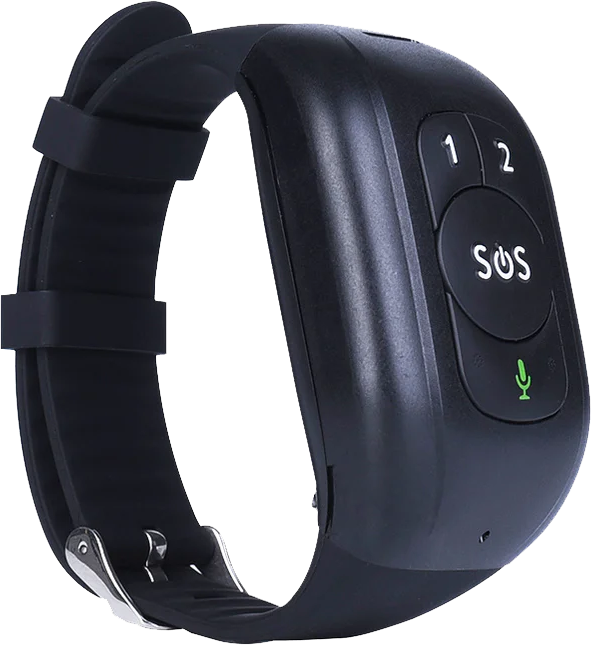
RF48 Device Manual

Getting Started
1. Charge your Pendant for few hours by attaching the magnetic charger to the back. You will notice it just snaps on.
2. Press the button on the device to request the device’s charging status; if the RED LED flashes, the device is still recharging. If the RED LED is emitting a solid state, the device is fully charged and may be removed from its charging dock.
3. Use the screwdriver provided to loosen the two screws. (3)
4. Remove the seal with the SIM tool and insert a micro SIM card in the slot as shown by the symbol on the device.
5. Use the SIM tool to ensure the SIM card has been inserted properly.
6. Place the seal back in the sim slot, aligning the holes with the device’s holes.
7. Place the small metal plate on top of the seal and re insert the screws removed in step (2). Then fasten the screws with the screwdriver.
8. Please note that having an activated/registered, recharged SIM card is crucial for the device’s communication. Always ensure Airtime and SMS bundles are loaded on your SIM to ensure communication to your service provider. Your service provider may offer SIM management as part of your service.
9. Take the lanyard provided and feed the thin end into the lanyard hole on the pendant device. Using the SIM tool (from the other side of the hole) you can thread the lanyard through and loop over itself.
10. Press and hold the button (1) for a few seconds until you hear a voice say ‘’Hello".
11. Wait for about 1 minute until the red LED light (6) turns green. Your device will now be linked to the MyLifeline network.
12. Log in to your MyLifeline account by using the email address you provided your service provider and create your password.
13. Manage your information and contact information of your pendant device on your MyLifeline account using your internet browser.
14. Once you have updated and SAVED all your changes, restart/reboot the device by pressing and releasing the button on the device in quick succession until the LED turns off. This is to ensure the device requests new information from the system that may have changed. Updates can take up to a day depending on your location and network provider.
15. Once the device has powered on and the voice said ‘’Hello!’’, wait approx.. 1 to 2 minutes and press the panic button for 1 second. If the LED is:
SOLID RED : Your device is powered on, but not connected to MyLifeline.
FLASHING RED: Your device’s battery is low and must be recharged.
SOLID GREEN: Connected to MyLifeline.
BLUE: Communication is being sent by the device to MyLifeline and your contacts on your profile.
NO LED (with audible tone) : Your device is powered on, but may not have a SIM inserted or Your device is powered on, but may not have a SIM inserted or activated.activated.
16. Once your LED status is GREEN, press and hold the button (1) in until your hear 3 beeps. Your signal is now sent to the system.
17. The emergency contacts you specified will receive an SMS. Please note the SMS delivery duration is dependent on the signal strength of your device and on the signal strength of your emergency contact's device.
18. Please note that your chosen network operator may disconnect your network or fail to provide service in an area for any reason and without prior notice to you due to any reason they may/may not provide. It is YOUR RESPONSIBILITY to ensure your device is always in a working order and connected to the MyLifeline system.
19. Test your device often and ensure you have a working, recharged SIM inserted.
20. Your GPS accuracy will be best outdoors. Test your device outdoors for the first time, the system will record your last GPS location.
Device Manual
| Feature |
|---|
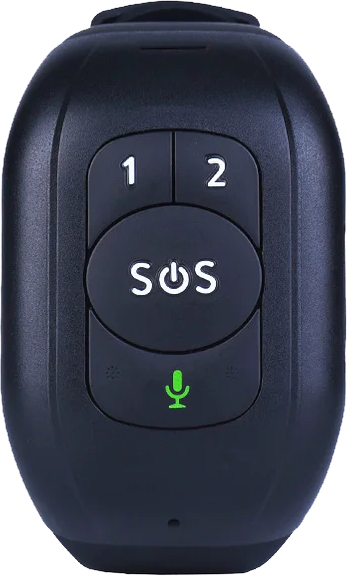
| 1. Speaker |
| Sound and other audio from the device is played from this speaker. |
| Ensure that the speaker is not covered when communicating via the device. |
| 2. Bracelet Key 1 |
| This feature is not available yet. |
| 3. Voice message |
| This feature is not available yet. |
| 4. Microphone |
| Ensure the Microphone hole is always free of any obstructions and visible. |
| Ensure you do not place your finger/hand over this hole when communicating. |
| 5. Bracelet Key 2 |
| This feature is not available yet. |
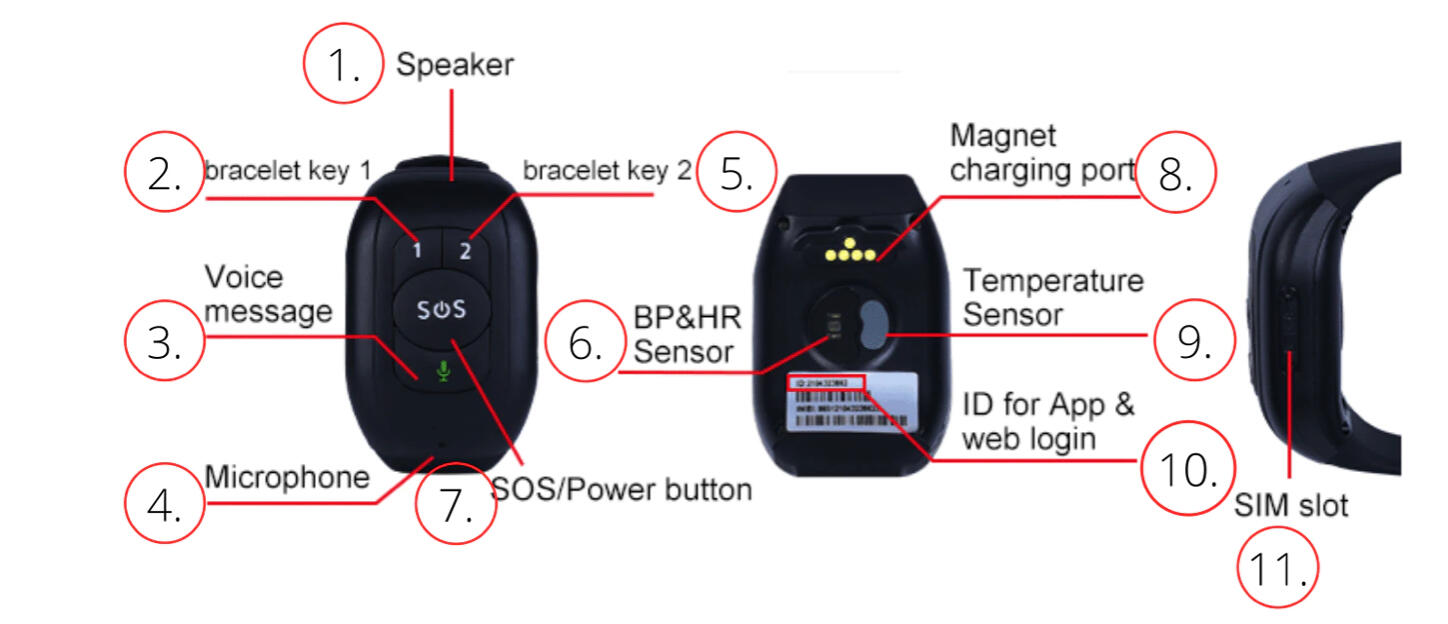
| 6. Blood Pressure & Heart Rate Sensor |
| The blood pressure and heart rate measuring sensor needs to make contact with the users wrist to ensure proper use. |
| Features currently limited. |
| 7. SOS Call & Power Button |
| Long press the SOS button to power on the device if it had been powered off. |
| Press the SOS button once to hear the Voice Prompt announce the current time (Voice Prompt must be activated). |
| Long press the SOS button to send a SOS alert to your contacts. |
| 8. Magnet Charging pins |
| These charging pins align with the pins in the charging base and connect via magnetic connectors |
| The expected charge time is around 01h30 when using a 5V2A travel adapter. |
| The expected battery life is 36 to 96 hours depending on your device's configuration and your movement, the frequency thereof and the duration. |
| 9. Temperature Sensor |
| This feature is not available yet. |
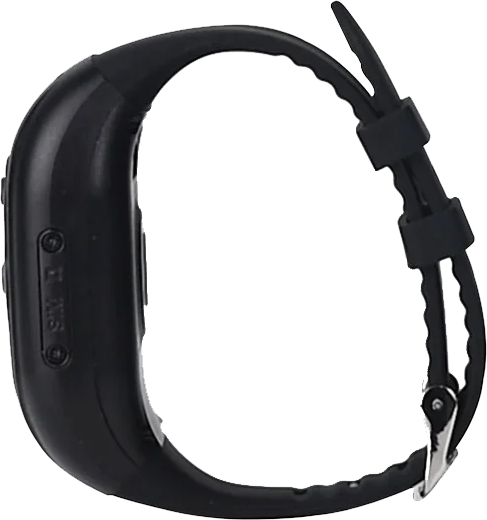
| 10. Device information |
| Information relating to your device can be found the back of the device on the sticker. |
| This information is referenced when setting up your device or for any queries regarding your device. |
| 11. SIM Slot |
| This device uses a Nano SIM card. Please DO NOT remove the SIM card. |
| 12. Waterproof |
| The RF V48 has an IP67 rating, which means you may shower with your device, but not submerge for depths greater than 1m. |
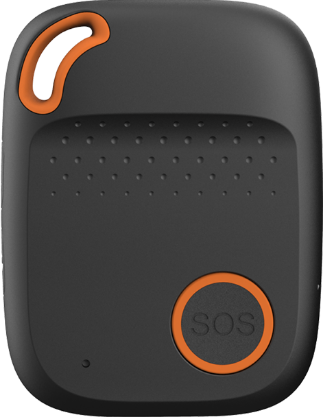
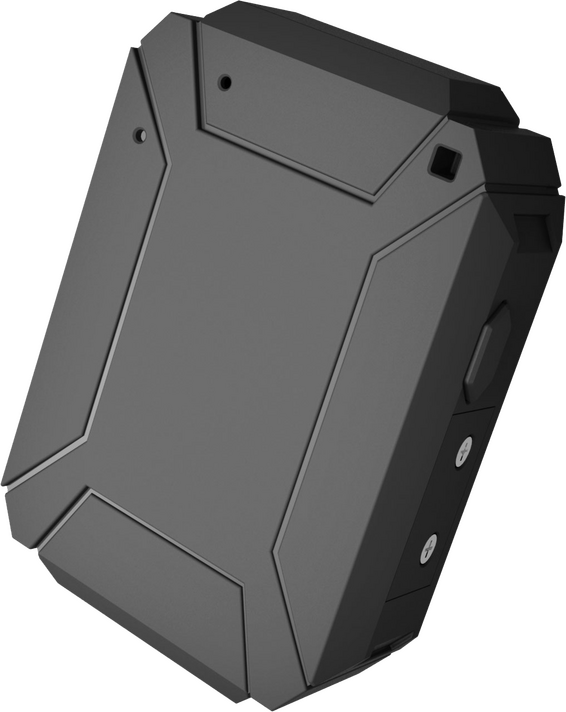
BI07 Device Manual

Getting Started
1. Charge your Pendant for few hours by attaching the magnetic charger to the back. You will notice it just snaps on.
2. Press the button on the device to request the device’s charging status; if the RED LED flashes, the device is still recharging. If the RED LED is emitting a solid state, the device is fully charged and may be removed from its charging dock.
3. Use the screwdriver provided to loosen the two screws. (3)
4. Remove the seal with the SIM tool and insert a micro SIM card in the slot as shown by the symbol on the device.
5. Use the SIM tool to ensure the SIM card has been inserted properly.
6. Place the seal back in the sim slot, aligning the holes with the device’s holes.
7. Place the small metal plate on top of the seal and re insert the screws removed in step (2). Then fasten the screws with the screwdriver.
8. Please note that having an activated/registered, recharged SIM card is crucial for the device’s communication. Always ensure Airtime and SMS bundles are loaded on your SIM to ensure communication to your service provider. Your service provider may offer SIM management as part of your service.
9. Take the lanyard provided and feed the thin end into the lanyard hole on the pendant device. Using the SIM tool (from the other side of the hole) you can thread the lanyard through and loop over itself.
10. Press and hold the button (1) for a few seconds until you hear a voice say ‘’Hello".
11. Wait for about 1 minute until the red LED light (6) turns green. Your device will now be linked to the MyLifeline network.
12. Log in to your MyLifeline account by using the email address you provided your service provider and create your password.
13. Manage your information and contact information of your pendant device on your MyLifeline account using your internet browser.
14. Once you have updated and SAVED all your changes, restart/reboot the device by pressing and releasing the button on the device in quick succession until the LED turns off. This is to ensure the device requests new information from the system that may have changed. Updates can take up to a day depending on your location and network provider.
15. Once the device has powered on and the voice said ‘’Hello!’’, wait approx.. 1 to 2 minutes and press the panic button for 1 second. If the LED is:
SOLID RED : Your device is powered on, but not connected to MyLifeline.
FLASHING RED: Your device’s battery is low and must be recharged.
SOLID GREEN: Connected to MyLifeline.
BLUE: Communication is being sent by the device to MyLifeline and your contacts on your profile.
NO LED (with audible tone) : Your device is powered on, but may not have a SIM inserted or Your device is powered on, but may not have a SIM inserted or activated.activated.
16. Once your LED status is GREEN, press and hold the button (1) in until your hear 3 beeps. Your signal is now sent to the system.
17. The emergency contacts you specified will receive an SMS. Please note the SMS delivery duration is dependent on the signal strength of your device and on the signal strength of your emergency contact's device.
18. Please note that your chosen network operator may disconnect your network or fail to provide service in an area for any reason and without prior notice to you due to any reason they may/may not provide. It is YOUR RESPONSIBILITY to ensure your device is always in a working order and connected to the MyLifeline system.
19. Test your device often and ensure you have a working, recharged SIM inserted.
20. Your GPS accuracy will be best outdoors. Test your device outdoors for the first time, the system will record your last GPS location.
Device Manual
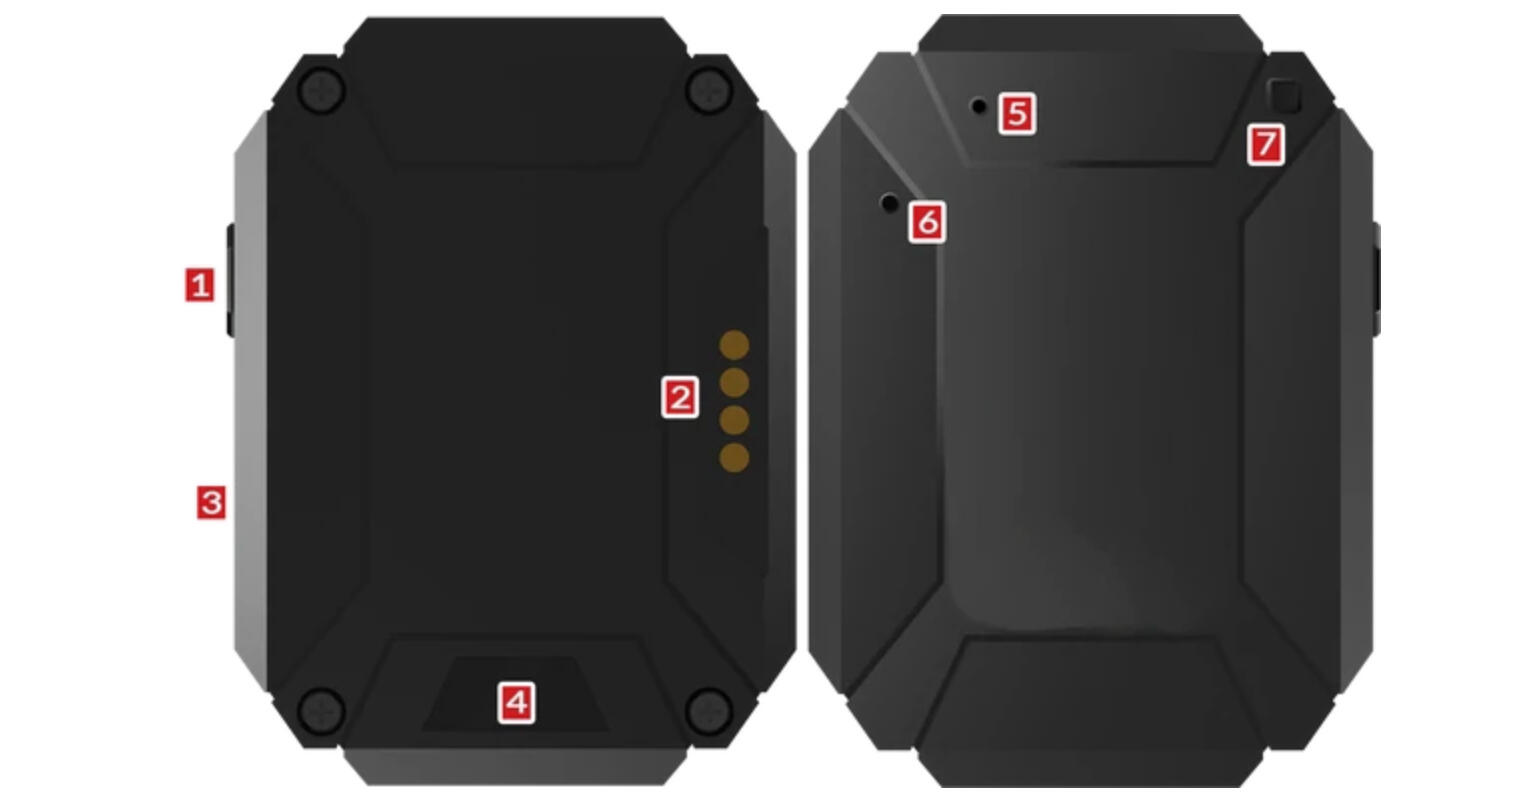
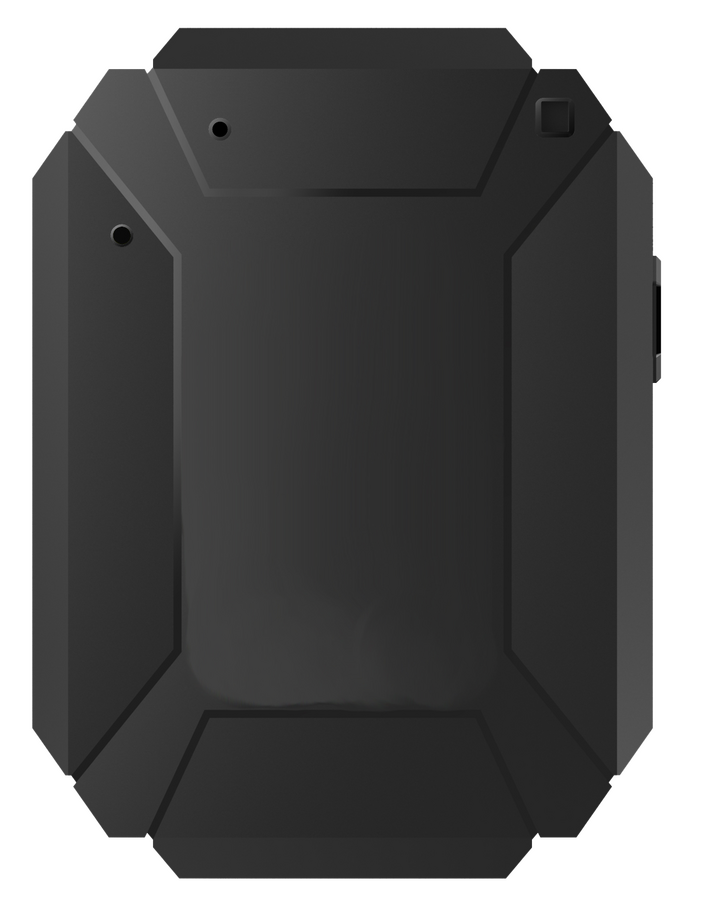
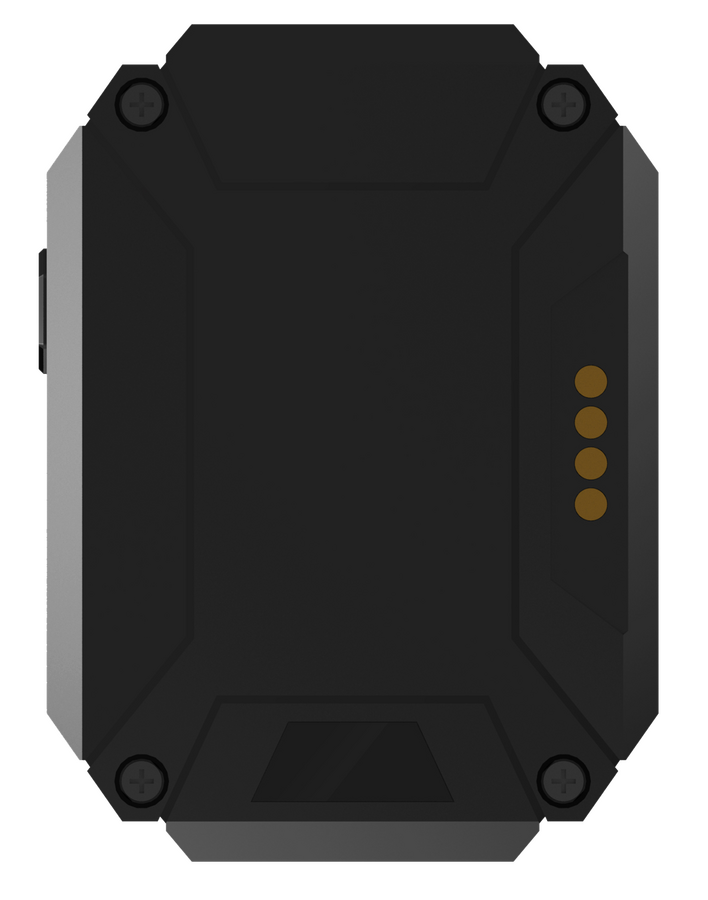
| Function |
|---|
| 1. Multi-Function button. |
| Long press to switch on. |
| When switched on long press to send panic signal. |
| 2. Magnetic charging pins. |
| 3. Sim slot plate and screws. |
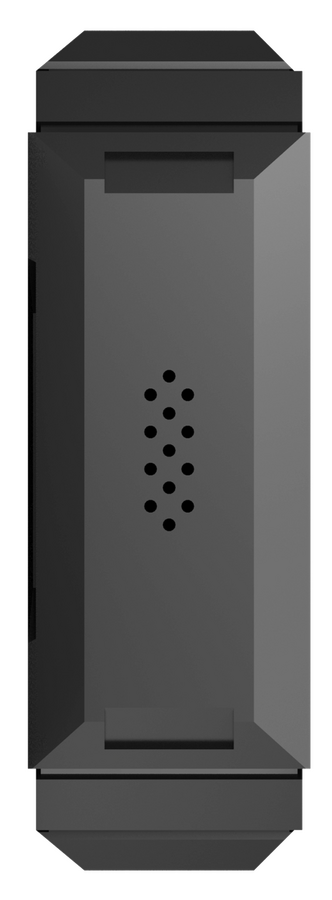
| 4. Device speaker. |
| 5. LED Indicator. |
| 6. Device microphone. |
| 7. Lanyard hole. |
Who we are
MyLifeline is a Cloud web based Emergency Platform founded in 2015. We have a range of panic buttons integrated into our platform. MyLifeline was the first company to provide a wearable panic device to the South African market and won the Santam Security Innovation award in 2018.